This chapter contains the following topics:
Introduction to the Commissions Due Report
You use the Commissions due report selection to print a report showing the commissions due to each of your sales representatives.
If your business does not use sales representatives, or if you employ them but do not pay them on commission, this chapter does not apply.
Depending on your entry in Control information, commissions may be based either on sales or on payments.
| • | If based on sales, commissions will appear on this report as soon as the sale is posted. |
| • | If based on payments, commissions due will not be included on this report until open items are either purged or logged as fully paid. The date you enter in the Open Items > Purge Thru what date field becomes the payment date on this report. |
If you are interfaced to the PBS Payroll module, be aware that commissions calculated here are not automatically entered into the payroll.
Two examples of the Commissions Due Report are in the Sample Reports appendix. One is for commissions paid on sales and the other is for commissions paid on fully paid open items.
Select
Commissions due from the Reports, general menu.
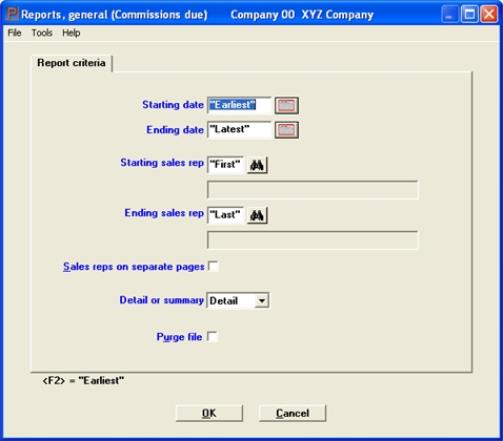
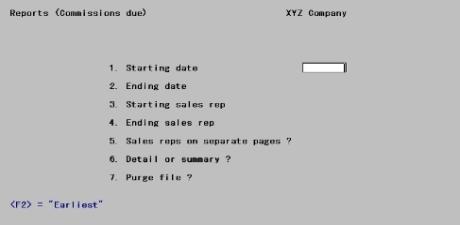
The following screen appears:
Graphical Mode

Character Mode

Enter the following information:
Specify the range of dates for which commissions due are to be included on the report.
| • | In the case of commissions based on sales, this range is compared to the invoice date. The report will print the invoice date. |
| • | In the case of commissions based on payments, this range is compared to the Thru what date field entered when either purging open items or logging commissions. In this case the report prints the purge date. |
You may also use the option:
|
<F2> |
For Earliest starting date or Latest ending date |
|
Format |
MMDDYY |
|
Example |
Type 30105 for the starting date Press <F2> for the ending date |
Starting sales rep and
Ending sales rep
Specify the range of sales rep numbers to include, or use the option:
Options
|
<F2> |
For "First" starting sales representative or "Last" ending sales |
|
Format |
3 characters |
|
Example |
Press <F2> at each field |
Check the box or enter Y if you want to print the information for each sales representative on a new page.
|
Format |
Graphical: Check box, where checked is Yes and unchecked is No Character: One letter, either Y or N. The default is N. |
|
Example |
Press <Enter> |
You can show individual invoice detail for every item with a commission, or you can show a summary report for each sales rep. Enter D or select Detail for the detailed report or S or select Summary for the summary report.
|
Format |
Graphical: Drop-down box, either Detail or Summary Character: One letter, either D or S. There is no default. |
|
Example |
Type D |
If you check the box or enter Y, all the commissions due information printed on the report will be purged after printing is complete; otherwise, it will be retained.
|
Format |
Graphical: Check box, where checked is Yes and unchecked is No Character: One letter, either Y or N. The default is N. |
|
Example |
Press <Enter> |
Select OK to print or Cancel to return to the menu without printing.
If you select OK, there will be a period of processing as printing, and optionally purging, occurs.
Character Mode
Make any needed changes, then press <Enter> from Field number to change ?. After selecting the printer there will be a period of processing as printing, and optionally purging, occurs.