This chapter contains the following topics:
Adding Cost Centers, Companies, or modules
Adding Accounts for a Cost Center
Removing Accounts for a Cost Center
Transferring Net Profit or Loss
Defining Proforma Chart of Accounts
This chapter describes several procedures that may be useful when adding a new company or a new cost center, or when installing a new Passport Business Solutions accounting module. These procedures are not used for normal day-to-day processing.
All modules need to know what account numbers are valid (so they can validate the numbers you enter). The G/L module needs to know this also, but there are many other things it needs to know about an account.
Since some users require only the G/L module, and other users do not require G/L at all, two separate files are maintained:
| • | The Chart of Accounts are used by G/L, and contains historical and other information about each account. |
| • | The Valid G/L Accounts are used by all the other modules, and contains nothing but the name and number of each account. When using Pathfinder or Data Initialization, be aware that this data is not part of the G/L module but belongs to the System Manager. |
If you use some other Passport Business Solutions module[s] in addition to G/L, you have both these files. It is important that they agree with each other, because when Get distributions transfers distributions from some other module it expects accounts from the Valid G/L Accounts to match accounts in the G/L Chart of Accounts.
If until now you have only been using one of these files/tables, you can use either as the basis for initializing the other. Of course, if you initialize the Chart of Accounts from the Valid G/L Accounts, the result is only a skeleton and needs to be hand-tailored further.
If you already have both files/tables, you can keep them synchronized by specifying (in Control information) that changes to the Chart of Accounts will automatically cause corresponding changes to the Valid G/L Accounts. This only works in one direction!
If you use this feature, you should avoid using the System Manager module’s Valid G/L accounts selection at all. You can use passwords to lock out this selection.
If you use cost centers, you can:
| • | Add a new cost center to the Chart of Accounts by copying from an existing cost center. |
| • | Remove a cost center from the Chart of Accounts. |
If you use sub accounts, you can:
| • | Add a new sub account to the Chart of Accounts by copying from an existing sub account. |
| • | Remove a sub account from the Chart of Accounts. |
If you use the multi-company feature, each company has its own copy of the Chart of Accounts and Valid G/L Accounts. You can:
| • | Copy a Chart of Accounts from one company to another. This is useful when you are adding a new company and wish to use an existing company as a model. |
| • | Add a new cost center to the Chart of Accounts by copying it from another company. |
You can also:
| • | Set fiscal year beginning balances upon initial installation of the module. |
| • | Define a Proforma Chart of Accounts. |
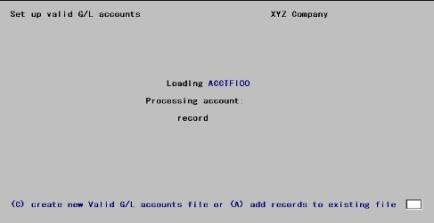
If you are installing another module after having used only the G/L module, this selection lets you create the Valid G/L Accounts from the Chart of Accounts. See the introduction to this chapter for an explanation of the relation between these two.
You may also use this selection to carry forward into the Valid G/L Accounts any new entries which you have recently made into the Chart of Accounts, without having to retype them. Note that this is only necessary if you have chosen (in the Update Valid G/L accounts when editing / changing G/L accounts field in Control information) not to have your Chart of Account changes automatically apply to your Valid G/L Accounts file.
Select
Set up valid G/L accounts from the Utility menu.
The following screen appears:

Enter the following information:
Create or Add
Options
Your choices are:
|
C |
To create a new Valid G/L Accounts. The existing data, if any, will be completely erased and every account currently on the Chart of Accounts will be copied into a new Valid G/L Accounts. |
|
A |
To retain the existing Valid G/L Accounts and to correct it by reference to the Chart of Accounts. Accounts which are present in the latter but not in the former will be added. The reverse is not the case — accounts which are present in the former but not the latter will not be deleted. |
Whichever you choose, the resulting data will not require further adjustment of individual entries (since all the information required by the target data is already present in the source data).
|
Format |
One letter, either C or A |
|
Example |
(If you are only using this documentation as a tutorial, do not actually execute this selection as you may destroy production data) |
If you enter A, you are asked: Any change ?
Answer Y to cancel, or N to proceed.
If you enter C, the following screen appears:
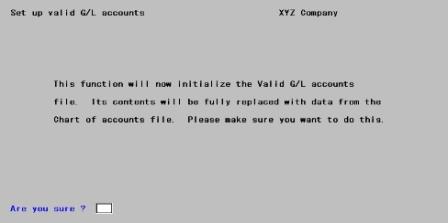
You are asked: Are you sure ?
Respond N to cancel, or Y to continue.
Whether you answered A or C, there will be a period of processing as accounts are added to the file. A running display will show the current account and a count of the records processed. Upon completion, press <Esc> to return to the menu.
This selection lets you create the Chart of Accounts from the Valid G/L Accounts. The feature is intended for those who have been using module[s] other than G/L, and who are now installing that module as well.
Because the source data contains only a list of accounts and their description, the resulting Chart of Accounts is incomplete and must be hand-tailored after creation (via Chart of Accounts (Enter)). Refer to the Chart of Accounts chapter for an explanation of the relation between these two.
Select
Set up chart of accounts from the Utility menu.
The following screen appears:
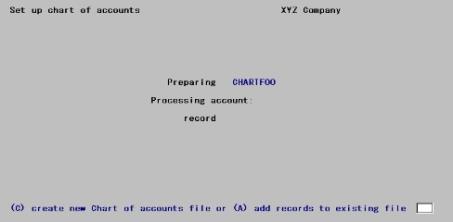
Enter the following information:
Create or Add
Options
Your choices are:
|
C |
To create a new Chart of Accounts. The existing data, if any, will be completely erased and every account currently on the Valid G/L Accounts will be copied into a new Chart of Accounts. |
|
A |
To retain the existing Chart of Accounts and to correct it by reference to the Valid G/L Accounts. Accounts which are present in the latter but not in the former will be added. The reverse is not the case — accounts which are present in the former but not the latter will not be deleted. |
Default assumptions are made for some fields in order to minimize the manual changes you will have to make after creating these records:
| • | The financial statement type is set to P (operating statement). |
| • | The parentheses control code is set to C (enclose when credit). |
| • | The compression code to N (no compression). |
No assumptions are made for other fields: SAF type, cash flow type, budgets, and comparatives.
|
Format |
One letter, either C or A |
|
Example |
(If you are only using this documentation as a tutorial, do not actually execute this selection as you may destroy production data) |
If you enter A, you are asked: Any change ?
Answer Y to re-enter the proceed, or N to proceed.
If you enter C, the following screen appears:
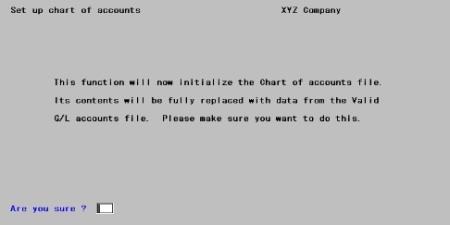
You are asked: Are you sure ?
Respond N to cancel, or Y to continue.
Whether you answered A or C, there will be a period of processing as accounts are added to the file. A running display will show the current account and a count of the records processed. Upon completion, press <Esc> to return to the menu.
Existing accounts retain their original settings (if you are adding records).
As processing occurs, a record counter on the screen displays each account added.
Use Chart of Accounts(Enter) to hand-tailor the new entries.
If you do not use cost centers or sub accounts (as determined by your account structure in Company information), skip this section.
Add accounts for a cost center (or sub account) adds a new cost center (or sub account) to your existing Chart of Accounts, by copying accounts from an existing cost center (or sub account) in the same company.
The account itself is copied, but not its actual and comparative amounts. The budget amounts may however be copied if desired.
The following discussion describes the function for sub accounts. Cost centers are processed similarly. Suppose you want to copy some accounts from sub account 300 to sub account 400:
| • | Sub account 300 must exist and there must be some accounts in it. Assume that these are accounts 1000-300 and 2000-300. |
| • | Sub account 400 may or may not exist. If it does not, you are asked to provide a description to be added to the sub account file. |
| • | Upon running the selection, accounts 1000-300 and 2000-300 will be copied to accounts 1000-400 and 2000-400. |
| • | It is safe to copy a range of accounts even though some accounts in the range are already present in the receiving sub account. Receiving accounts that already exist will not be overlaid. |
| • | Nothing happens to the sending accounts. |
| • | If the receiving sub account already contains accounts which do not correspond to any accounts in the sending sub account, those accounts are left unchanged. |
| • | If you have specified (in Control information) that your Chart of Account changes apply automatically to your Valid G/L Accounts, any account added by this selection to the Chart of Accounts is also added to the Valid G/L Accounts. |
If you use sub account groups, do not omit to add the new sub account to whatever group[s] you want it to belong to (using sub account groups (Enter).
Select
Add a sub account from the Utility menu.
The following screen appears:
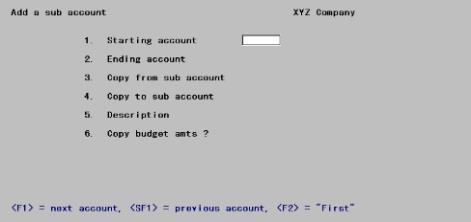
Enter the following information:
1. Starting account through
2. Ending account
Options
Enter the range of main accounts you intend to copy. You may use one of the options:
|
<F1> |
For the next account |
|
<SF1> |
For the previous account |
|
<F2> |
For the First starting account or the Last ending account |
It is not required that either account be on file, but the range of accounts should enclose at least one existing account in the cost center (or sub account) you are copying from.
If either account does exist in any cost center (or sub account), the description of the account on file for the first cost center (or sub account) for which that account exists will display below the account number. This will not necessarily be the same description as the account number in the cost center (sub account) you intend to copy from.
|
Format |
Your standard account number format as defined in Control information |
|
Example |
Press <F2> at each field for First through Last |
3. Copy from and
4. Copy to
Enter the sending and receiving cost centers (or sub accounts).
By default, cost centers are identified on the screen as Department (if only a single segment is used) or as Division and Department (if two segments are used). However if you have defined names different than these, those names will appear instead.
Options
If there is more than one cost center segment, each one must be entered separately.
|
<F1> |
For the next cost center (or sub account) |
|
<SF1> |
For the previous cost center (or sub account) |
Each segment of the sending cost center must already have been defined in the System Manager module’s Cost centers selection. Either or both segments of the receiving cost center may already have been defined, but this is not a requirement. If they do not already exist, they will be created. Likewise, a sending sub account must have been defined in Sub accounts.
|
Format |
Your standard format, as defined in Company information |
|
Example |
(If you are only using this documentation as a tutorial, do not actually execute this selection) |
The description of the selected cost centers (or sub accounts) will be displayed. If you use a two-segment cost center, each segment of each cost center will have its own description.
The cursor will move to the description field[s] of the receiving cost center (or sub account) only. If it is not already on file, you must enter a description for it. If it is on file, the existing description will display and may be changed if desired.
|
Format |
30 characters |
|
Example |
(Does not occur in this example) |
5. Copy budget amounts ?
This option lets you transfer the budget amounts from the old accounts to the new accounts. An answer of Y will copy the budget amounts. An answer of N will skip this function, leaving the new accounts with no budgets.
|
Format |
One letter, either Y or N |
|
Example |
(Does not occur in this example) |
If you answered Y to copy budget amounts, you must specify which budgets to copy.
Options
Enter a budget type, or use one of the following options:
|
<F1> |
For the next budget type |
|
<SF1> |
For the previous budget type |
|
<F5> |
For All budget types |
|
Format |
15 characters |
|
Example |
(Does not occur in this example) |
Field number to change ?
Make any desired changes. When you press <Enter> with this field blank, there will be a period of processing as new entries in the Chart of Accounts are created. A running display of the accounts processed will appear on the screen, and you will be informed when all have been copied. Press <Esc> to return to the menu.
If you do not use cost centers or sub accounts (as determined by your account structure in Company information), skip this section.
Remove accounts for a cost center (or sub accounts) removes obsolete cost centers or sub accounts from the Chart of Accounts. It also removes the corresponding records from Budget and Comparative. If you have specified (in Control information) that changes to the Chart of Account are to be applied automatically to the Valid G/L Accounts, the accounts are removed from that file/table as well.
An account can be removed even when a non-zero budgeted amount is on file for it (but not when a non-zero actual or comparative amount is on file).
Only one cost center at a time can be removed. If you use two cost center segments, deleting either a division or a department is accomplished by individually removing each cost center containing that division or department.
No report is printed of the purged accounts. If this is desired, run Chart of Accounts (Print) for this cost center or sub account before running this selection.
Select
Remove a cost center (or sub account) from the Utility menu.
Removing the accounts does not:
| • | Delete the cost center or sub account itself (or either segment of the cost center, if there are two). If you wish to do this, use the Cost centers or sub accounts selection after (not before) running this selection. |
| • | Delete the cost center or sub account from any group[s] of which it may be a member. To do this, use Cost center groups or Sub account groups after running this selection. |
The following screen appears:
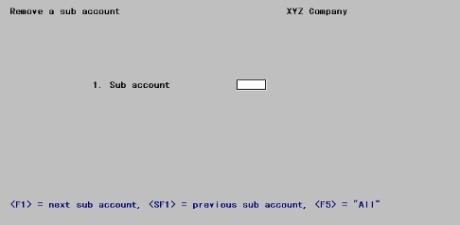
Enter the following information:
1. Department or
1. Division and 2. Department
Enter the cost center (or sub account) to be removed.
If your account structure has only one segment in its cost center, only Field #1 will appear.
If you have defined some name other than the defaults (Division and Department), that name will appear here instead.
Enter the cost center (or sub account) you wish to delete. If there is more than one cost center segment, each one must be entered separately.
Options
You may also use one of the following options:
|
<F1> |
For the next cost center segment |
|
<SF1> |
For the previous cost center segment |
|
Format |
Your standard format, as defined in Company information |
|
Example |
(If you are only using this documentation as a tutorial, do not actually execute this selection) |
The description of the selected cost center or sub account will be displayed. If you use a two-segment cost center, each segment of the cost center will have its own description.
|
Format |
30 characters |
|
Example |
(If you are only using this documentation as a tutorial, do not actually execute this selection) |
Field number to change ?
Make any desired changes. Press <Enter> and the system will verify that there is at least one entry in Chart of accounts for this cost center. It will also check whether:
| • | There are any transactions on file for this cost center or sub account. |
| • | There are any non-zero comparatives or actuals on file for this cost center or sub account. |
If so, you cannot run this selection.
Otherwise, there will be a period of processing as records are removed from the files. A running display shows the record currently being deleted, and notifies you when done. Press <Esc> to return to the menu.
If you do not use the multi-company feature, skip this section.
Use Copy chart of accounts to copy some or all of another company’s Chart of Accounts into this company’s. This is sometimes useful when creating a new company or a new cost center.
If you merely wish to copy within one company’s Chart of Accounts, refer to the Add a cost center or Add a sub account selection in this chapter.
Neither budgets, comparatives, nor actuals are copied — only the accounts themselves, with zero values for all these amounts.
If you have specified (in the receiving company’s Control information) that changes to the Chart of Account are to be applied automatically to the Valid G/L Accounts, the copied accounts are added to that file/table as well.
Select
Copy chart of accounts from the Utility menu.
The following screen appears:
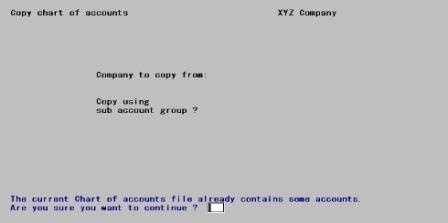
The current Chart of accounts file already contains accounts
This message appears if the receiving file/table is not empty. This condition is to be expected if you were adding a new cost center, but would be unusual if you were adding a new company. You are asked if you wish to continue. Answer Y to continue or N to cancel.
|
Format |
One letter, either Y or N. There is no default. |
|
Example |
Type Y |
Company to copy from:
Options
Enter the company-ID of the company from which to copy. The sending company must be already present in the Multi-company file/table and cannot be the same as the receiving company. You may also use one of the options:
|
<F1> |
For the next company |
|
<SF1> |
For the previous company |
|
Format |
Two characters |
|
Example |
(Type the code of any of your existing companies.) |
The account number structure for the source company is different from the destination company.
This message appears if the account number structures are not exactly the same for the two companies. You are asked if you wish to continue. Answer Y to continue or N to cancel. Be aware that loading incompatible account structures may cause serious data corruption. Specifically:
| • | Alphanumeric segments should not be copied into numeric ones |
| • | Long segments should not be copied into shorter ones |
| • | Cost centers with two segments should not be copied to those with only one |
| • | Companies that use subaccounts should not be copied into companies that do not. |
|
Format |
One letter, either Y or N. The default is N. |
|
Example |
Type Y |
If the receiving company has no cost centers defined, this question will not appear on the screen. Otherwise, enter Y if you wish to copy an entire group. Enter N if you either wish to copy all accounts or you wish to copy a single cost center or sub account.
|
Format |
One letter, either Y or N. The default is N. |
|
Example |
Type Y |
If you answer Y to the question Copy using cost center (or sub account) groups ?, the following appears:
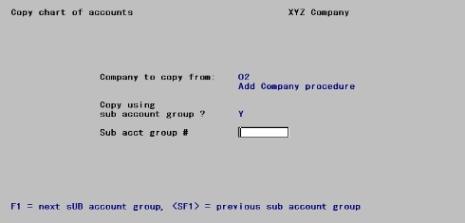
Cost center (or sub account) group #
Options
Enter the code of the receiving company’s group. You may also use one of the options:
|
<F1> |
For the next group in the receiving company |
|
<SF1> |
For the previous group |
Source company accounts are selected solely on the basis of their cost center’s or sub accounts membership in the receiving company’s group. It is irrelevant what groups the sending company may have (if it even has any).
|
Format |
Eight characters |
|
Example |
Press <F1> |
Description
The description of the selected group will be displayed.
If you are using cost centers
If you answer N to the question Copy using cost center groups ?, you will be prompted for cost center segment information.
Department or Division and Department
The first format appears if your account structure has only one segment in its cost center, and the second if there are two.
If you have defined some name other than the defaults (Division and Department), that name will appear here instead.
Enter the cost center or sub account you wish to copy. The cost center or sub account must already exist in the receiving company.
Options
You may use the option:
|
<F5> |
For All. |
If you use two-segment cost centers, you can copy an entire department by entering the department in the first segment and pressing <F5> in the second. The reverse procedure copies a division. Pressing <F5> in both segments copies the entire Chart of Accounts.
|
<F1> |
For the next cost center (or sub account) segment in the receiving company |
|
<SF1> |
For the previous cost center segment (or sub account) |
Cost center segments defined as numeric in both companies, and containing identical values, will be recognized as the same cost center — even if the segment lengths are different. Likewise for cost center segments described as alphanumeric in both companies. However, cost center 123, described as numeric in one company and alphanumeric in the other, will not be recognized as the same cost center. This is because one company stores it internally with trailing spaces, the other with leading zeroes.
|
Format |
The receiving company’s standard format, as defined in its Company information |
|
Example |
(Does not occur in this example) |
The description of the selected cost center or sub account will be displayed. If you use a two-segment cost center, each segment of the cost center will have its own description.
Any change ?
Answer Y to re-enter the screen, or N to continue.
|
Format |
One letter, either Y or N. There is no default. |
|
Example |
(If you are only using this documentation as a tutorial, do not actually execute this selection. Type Y.) |
If you answer N, there will be a period of processing as records are copied. A running display shows the record currently being processed, and notifies you when done. Press <Esc> to return to the menu.
Set beginning balances is run only once, when you first set up the General Ledger module.
This selection sets beginning balances for balance sheet accounts. It does so by creating a Distributions Journal entry for each balance sheet account in the amount of the comparative for the last valid period of the previous fiscal year. This entry must then be posted to G/L transactions.
You must previously have entered the comparative amounts manually, using the Chart of Accounts (Enter) or Comparatives (Enter) selections. The amount must be entered in the period of the previous fiscal year corresponding to the last defined period in your current fiscal year (usually the twelfth). If you prefer not to use this feature, you can set balances manually by making one entry for each account balance in Distributions Journal, with a reference of BBF (balance brought forward).
Running this selection more than once generates erroneous duplicate beginning balance entries.
Each General Journal transaction that is created contains:
| • | An amount equal to the year-end comparative of the previous fiscal year. If this is zero, no transaction is created. |
| • | A date exactly one year earlier than the year-end date of the current fiscal year, as shown in Accounting periods. |
| • | A source of BBF. |
| • | A reference of Balance brought forward. |
Select
Set beginning balances from the Utility menu.
You will be notified if the Distributions Journal Transaction file/table is not empty, and will not be able to continue.
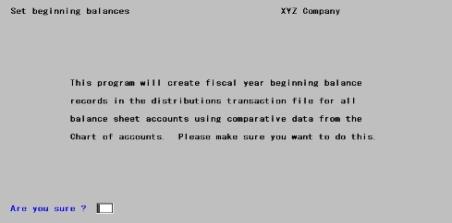
Otherwise, the following screen appears:
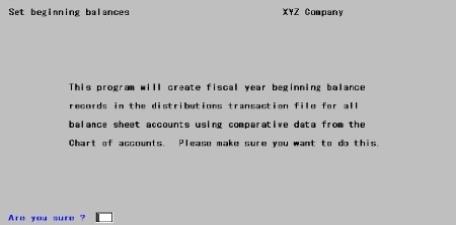
Enter the following information:
Are you sure ?
Answer N to cancel, or Y to continue.
If you answer Y, there will be a period of processing as records are created. A running display of the account currently being processed will appear. You will be notified upon completion; press <Esc> to return to the menu.
If the program encounters an unusual number of large comparative balances, all with the same sign, a message appears and you must enter the beginning balances manually. This is unlikely, but if it occurs, the entries already created in the Distributions Journal are erased and you will need to enter BBF (Balance Brought Forward) entries for each account through Distributions Journal.
When processing is complete, print the edit list in Distributions Journal to verify that the entries created are correct, before you post them to the General Ledger file.
You can make any changes desired through Distributions Journal.
If a change to the entry amount is necessary, you should correct the comparative amount in Comparatives as well.
Since entries are created for balance sheet accounts only, you need to create one additional entry to transfer last year’s net profit (or loss) to the retained earnings account (or to the equity account).
To do this, select the Enter option of the Distributions Journal menu, and make an entry dated with the last day of the previous fiscal year, for the amount of last year’s net profit (loss). Refer to the Distributions Journal chapter for more information.
If all other entries are correct, this entry brings the General Ledger into balance (debits equal credits).
Define Proforma Chart of Accounts simplifies the process of making financial statement layouts. Once you have created a Proforma Chart of Accounts, you can use Financial statement layouts (Make proforma layouts) to generate balance sheet and operating statement layouts. The resulting layouts can be fine-tuned using the standard Financial statement layout maintenance routines.
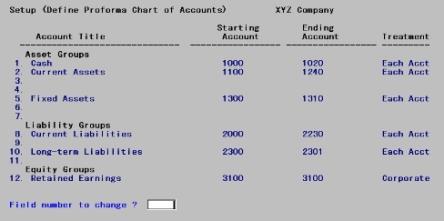
The screen takes the form of a table with numbered rows, each representing a group of accounts. The columns indicate (left to right) the name of the group, its starting and ending accounts, and the kind of treatment for that group. Two screens are required to contain the entire table. The first screen is for balance sheet entries and contains Asset, Liability, and Equity groups. The second screen is for the operating statement entries.
The basic structure of the table is fixed and assumes that you have followed standard accounting practice in assigning the sequence of account numbers in Chart of Accounts. If you have not, you will not be able to use this selection.
| • | Some of the groups, such as Cash or Current Assets, are predefined. You can change the title of the group or the range of accounts it contains, but not its basic meaning. |
| • | Other groups are up to you to define. They appear on the screen as a blank (but numbered) row. You can supply any content you want for this row. If you do not do so that group does not appear in your Proforma Chart of Accounts. You are limited to the number of rows that appear on the screen. For instance, there is a maximum of two groups within Fixed assets. |
The table occupies a single record in the Proforma Chart of Accounts file/table. When you make changes in this table you are in effect updating that record.
If when you run this selection the Proforma Chart of Accounts file/table does not exist or is empty, the program creates the basic skeleton. Thus you are never faced with a completely blank screen.
It is possible that maintenance in Chart of accounts (Enter) will result in inconsistencies between the Chart of Accounts and the Proforma Chart of Accounts. If the program encounters this situation, it informs you that there is a problem with your proforma chart of accounts and reverts to the basic skeleton. You then have to re-enter the groups as you desire them.
Neither the Define Proforma Chart of Accounts selection nor the Financial statement layouts (Make proforma layouts) selection alters the Chart of Accounts itself. To make effective use of this feature, the Chart of Accounts must already have correct settings for:
| • | Subtotal level |
| • | Financial Statement type |
| • | SAF type |
| • | Parenthesis-control code. |
Select
Define Proforma Chart of Accounts from the Utility menu.
The first screen appears:
From this screen you can work with new or existing entries. For an existing entry, the cursor will be positioned at Field number to change?. For a new entry, the cursor will move through each row in sequence. Even a new entry will not show a blank screen, since the predefined rows (those for which a title appears in the screen above) will always be present.
Enter the following information:
1. Cash through
12. Retained Earnings
The cursor moves left to right through each column for that row, except that when the title is blank the cursor does not move through the remainder of that row.
Account title
Enter the title of the account as you want it to appear on your financial statements. Group similar accounts together. The account titles will be used as subheadings on your balance sheet or operating statement layout.
Where an explicit title is shown in the illustration, that row is required. The title may be changed but not blanked out.
Where no explicit title is shown, a new row may be added by changing a blank title to non-blank, or deleted by doing the reverse.
Any row with a non-blank title requires non-blank input in the remaining columns of that row. Conversely a blank title forces the remainder of the row to be blank as well.
|
Format |
30 characters |
|
Example |
Enter information as shown on the screen below. |
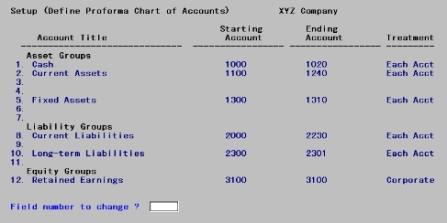
Starting account and Ending account
These define the range of accounts to be included within the account title. They need not correspond to any actual account. Only the main account number is entered.
The starting account for Field #1 is always zero and cannot be changed.
Within a row, the ending account must be greater than (not merely equal to) the starting account. Field #12 is an exception: both its starting and ending accounts are set to whatever you have defined as the Retained Earnings account in Control information. They cannot be changed.
Between rows, each row’s starting account must be greater than the ending account of the preceding row, and each row’s ending account must be less than the starting account of the next.
Every account in Fields #1 through 11 must be less than the Retained Earnings account.
|
Format |
Your main account, in the format defined in Company information. |
|
Example |
Enter information as shown on the screen below. |
Treatment
Options
The treatment field defines a variety of ways that the account information may display on your report. The choices available vary by row:
|
Cash account |
|
Option |
Displays as |
Meaning |
|
M |
Main Only |
Shows a summary amount for all subaccounts within a main account. When you use Make proforma layouts all subaccounts will be summarized under the appropriate main account. |
|
E |
Each Acct |
Shows amounts for every account and subaccount. An entry will be built in the layout for every main account and subaccount combination. |
|
O |
One Line |
Shows one summary line for the cash account. |
|
All accounts except Cash and Retained Earnings |
|
Option |
Displays as |
Meaning |
|
M |
Main Only |
(as for Cash account above) |
|
E |
Each Acct |
(as for Cash account above) |
|
Retained Earnings account |
|
Option |
Displays as |
Meaning |
|
C |
Corporate |
When you use Make proforma layouts, the equity area will be a stockholder’s equity type layout. |
|
N |
Non-Corp |
The equity area will be an owners’ equity type layout. |
|
Format |
One letter from the list above |
|
Example |
Enter information as shown on the screen. |
Field number to change ?
Make any needed changes. Press <Enter> for the next screen:
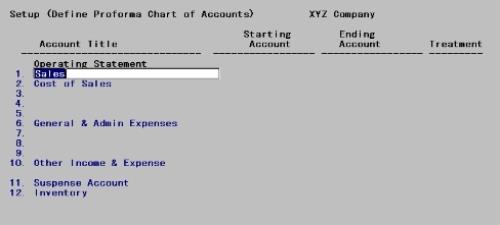
Enter the following information:
1. Sales through
12. Inventory
The cursor moves left to right through each column for the row.
Account title
Enter the title as you did on the first screen.
|
Format |
30 characters |
|
Example |
Enter information as shown on the screen below. |
Starting account and Ending account
These are entered as on the first screen.
The starting account for Field #1 must be greater than the Retained Earnings account (the last account on the previous screen).
Within a row, the ending account must be greater than the starting account.
Between rows, each row’s starting account must be greater than the ending account of the preceding row, and each row’s ending account must be less than the starting account of the next.
The Inventory and Suspense accounts are exceptions to both these rules: their ending account may be the same as their starting account, and they need not be in sequence with each other or with any other accounts.
|
Format |
Your main account (only), in the format defined in Company information |
|
Example |
Enter information as shown on the screen above. |
Treatment
Options
The choices available vary by row:
|
All accounts except Suspense and Inventory |
|
Option |
Displays as |
Meaning |
|
M |
Main Only |
Shows a summary amount for all subaccounts within a main account. When you use Make proforma layouts all subaccounts will be summarized under the appropriate main account. |
|
E |
Each Acct |
Shows amounts for every account and subaccount. An entry will be built in the layout for every main account and subaccount combination. |
|
Suspense account |
|
Option |
Displays as |
Meaning |
|
B |
Below Csh |
Display suspense account below cash accounts |
|
R |
W/Ret Ern |
Display suspense account with retained earnings |
|
I |
W/Oth inc |
Display suspense account as part of Other Income |
|
Inventory account |
|
Option |
Displays as |
Meaning |
|
P |
Periodic |
Generate a single entry for cost of goods sold on the operating statement. |
|
T |
Perpetual |
Generate entries for beginning and ending inventory on the operating statement. |
|
Format |
One letter from the list above |
|
Example |
Enter information as shown on the screen below. |
Field number to change ?
Make any needed changes. Press <Enter> to return to the menu.