This chapter contains the following topics:
Introduction to Master Information
Master information includes functions that allow you to further define your Inventory Control system. Some of these selections are explained in their own chapters; we cover the remaining Master information functions in this chapter.
Master information functions that are explained in their own chapters include Control Information, Price Codes, Inventory Accounts, Commission Codes, and Warehouses. These selections are not covered again in this chapter.
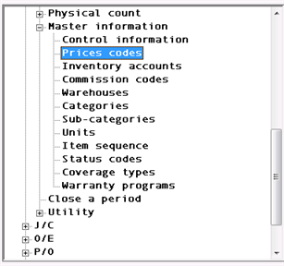
Master information functions that are explained in this chapter include Categories, Sub-categories, Units, Item sequence, Status codes, Coverage types, and Warranty programs. The menu selections are seen below:
Inventory Control allows you to associate each item with a category and/or sub-category.
You can enter Categories and Sub-categories as criteria for your reports.
If you have a category called Tools, you can specify to only have items that have a category of Tools to print on the report.
Item G/L Accounts
Categories enable you to enter the Inventory, Sales, Expense and Credit Memo General Ledger account numbers in Items.
When you enter a category into the item, once you get to the Vendor/Accounting tab (last screen of entry in Character mode), these accounts will automatically be defaulted to the chosen category. You can change them at that time. If you are not assigning cost centers/(sub account) to items, per I/C Control information, the cost center/(sub account) is still being pulled in from the Category entered on the item. However the item cost center/(sub accounts) are not used. If you change Control information to assign cost centers/(sub accounts) per item, then you should review the sub accounts entered for items.
To enter categories, follow these steps:
Select
Categories from the Master information menu.
The following screen displays:
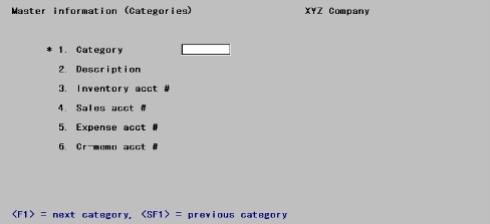
From this screen you can work with both new and existing category codes. Enter the information as follows:
*1. Category
Options
Enter the category code, or use one of the options:
|
<F1> |
For the next category |
|
<SF1> |
For the previous category |
|
Format |
Up to five characters |
|
Example |
Type Tools |
2. Description
Enter the category description.
|
Format |
Up to 25 characters |
|
Example |
Type Power Tools |
3. Inventory acct #
Enter the inventory account number or press <F2> for the default inventory account defined in Control information.
|
Format |
Your standard account number format as defined in Company information |
|
Example |
Press <F2> |
4. Sales acct #
Enter the sales account number associated with this category.
|
Format |
Your standard account number format as defined in Company information |
|
Example |
Enter account 4010-100 |
5. Expense acct #
Enter the expense account number associated with this category.
|
Format |
Your standard account number format as defined in Company information |
|
Example |
Enter account 5020-100 |
6. Cr-memo acct #
Enter the credit memo account number associated with this category.
|
Format |
Your standard account number format as defined in Company information |
|
Example |
Enter account 5080-100 |
Sub-categories are associated with a category. You can define multiple sub-categories against one category.
Select
Sub-categories from the Master information menu.
The following screen displays:
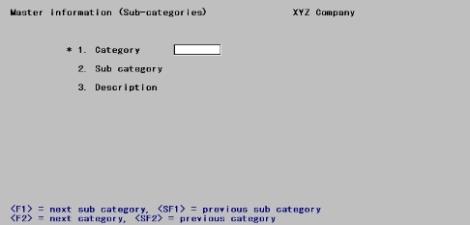
From this screen you can work with both new and existing sub-category codes. Enter the information as follows:
*1. Category
Options
Enter the category code, or use one of the options:
|
<F1> |
For the next sub-category |
|
<SF1> |
For the previous sub-category |
|
<F2> |
For the next category |
|
<SF2> |
For the previous category |
|
Format |
Up to five characters |
|
Example |
Type Tools |
2. Sub category
Options
Enter the sub-category code, or use one of the options:
|
<F1> |
For the next sub-category |
|
<SF1> |
For the previous sub-category |
|
Format |
Up to five characters |
|
Example |
Type Elec |
3. Description
Enter the sub-category description.
|
Format |
Up to 25 characters |
|
Example |
Type Electric Power Tools |
Both categories and sub-categories must be entered here before they can be used in items.
You may print a list of Categories, and may include or exclude Sub-categories on the report.
Select
Categories from the Master info menu.
The following screen displays:
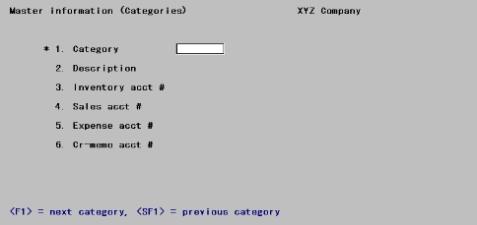
From this screen you can define the range of categories that you wish to print, and you can include or exclude sub-categories.
1. Print sub-categories?
Enter Y if you wish to have sub-categories print on the report; otherwise enter N.
2. and 3. Starting and Ending category
Enter the range of categories you want to include on the report.
4. and 5. Starting and Ending sub-category
Enter the range of sub-categories you want to include on the report.
You may modify your selection criteria from Field number to change ?, or press <Enter> to print the report.
Units refer to units of measure.
All units of measure that will be used for an item, must be defined under Units first. If the unit is not defined, you can not use it.
Units for stocking, pricing, weight, depth, height and width must be defined before you can use them in items.
To enter units, follow these steps
Select
Units from the Master information menu.
The following screen displays:
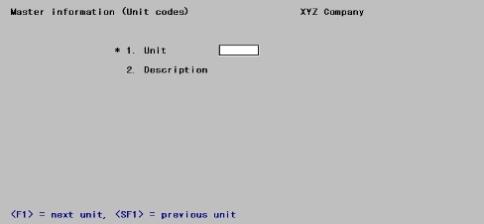
From this screen you can work with both new and existing Units. Enter the information as follows:
*1. Unit
Options
Enter the unit code, or use one of the options:
|
<F1> |
For the next unit |
|
<SF1> |
For the previous unit |
|
Format |
Up to four characters |
|
Example |
Type Case |
2. Description
Enter the unit description.
|
Format |
Up to 10 characters |
|
Example |
Type Case/24 |
You may print a list of Units.
Select
Units from the Reports, Master info menu.
The following screen displays:
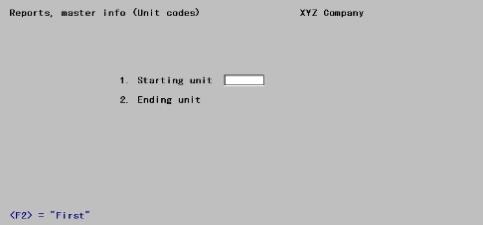
From this screen you can define the range of units that you wish to print.
Item sequence numbers allow auto item numeric number sequencing for new items.
This is helpful if you have certain groups or types of items that follow a specific numbering scheme.
You access item sequence numbers when you are in Items Enter by pressing the <F5> key.
Every time you use an item sequence number, the number will automatically be incremented by one.
To enter item sequence numbers, follow these steps:
Select
Item sequence from the Master information menu.
The following screen displays:
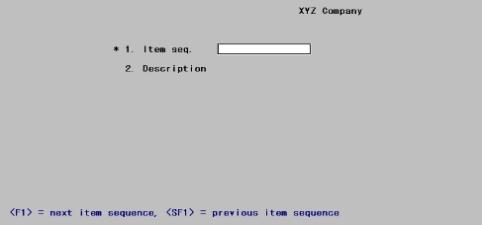
From this screen you can work with both new and existing Item Sequence Numbers. Enter the information as follows:
*1. Item seq.
Options
Enter the item sequence number, or use one of the options:
|
<F1> |
For the next item sequence number |
|
<SF1> |
For the previous item sequence number |
|
Format |
Up to 15 characters |
|
Example |
Type 195000 |
2. Description
Enter the item sequence number description.
|
Format |
Up to 25 characters |
|
Example |
Type Laptop Computer |
You may print a list of your Item Sequence Numbers.
Select
Item sequence from the Reports, Master info menu.
The following screen displays:
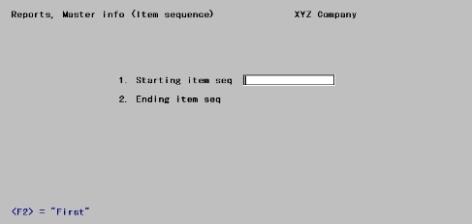
From this screen you can define the range of item sequence numbers that you wish to print.
When you enter in your inventory items, you will be asked to enter in Status.
All status codes are user defined and can be anything you like. Examples of Status codes are Active and Inactive.
Status is a mandatory field when entering items.
Status can be used as selection criteria when printing most of the inventory reports.
These must be defined in Status codes before you can enter them in items.
Status codes are single characters, with an associated description.
This Status code is not the same as status records, which maintains your items warehouse information.
To enter status codes, follow these steps:
Select
Status codes from the Master information menu.
The following screen displays:
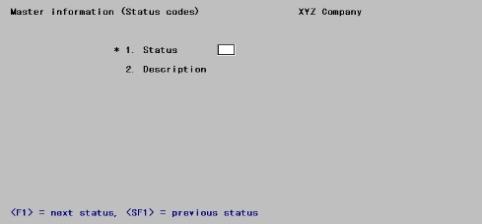
From this screen you can work with both new and existing status codes. Enter the information as follows:
*1. Status
Options
Enter the status code, or use one of the options:
|
<F1> |
For the next status |
|
<SF1> |
For the previous status |
|
Format |
One character |
|
Example |
Type A |
2. Description
Enter the Status description.
|
Format |
Up to 25 characters |
|
Example |
Type Active item |
You may print a list of your Status codes.
Select
Status codes from the Reports, Master info menu.
The following screen displays:
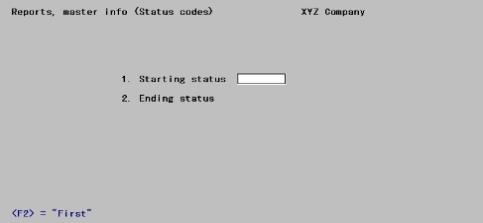
From this screen you can define the range of status codes that you wish to print.
Coverage is something you get when you purchase a warranty, or get a warranty with the purchase of a product. You get a certain type of coverage, for a certain length of time.
In Coverage Types, we define the different coverages that will be available under our warranty programs. In an example, extended coverage would cover everything.
There are four pre-defined coverage categories and one user defined coverage category (this is defined in Control Information).
| • | Parts |
| • | Labor |
| • | Travel |
| • | Exchange |
| • | Refund (user defined coverage category from Control information) |
Once all of your coverage types are defined, they can then be used under the Warranty Programs.
Define the coverage code and provide a description.
Then you can flag which coverage code is applicable to this coverage type.
|
Note |
You should always define a coverage type that covers nothing. We will discuss why when we cover warranty programs. |
To enter a coverage type, follow these steps:
Select
Coverage types from the Master information menu.
The following screen displays:
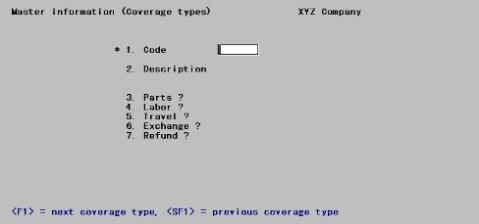
From this screen you can work with both new and existing coverage types. Enter the information as follows:
*1. Code
Options
Enter the coverage code, or use one of the options:
|
<F1> |
For the next coverage |
|
<SF1> |
For the previous coverage |
|
Format |
six characters |
|
Example |
Type Extend |
2. Description
Enter the Coverage description.
|
Format |
Two lines of 25 characters each |
|
Example |
Type Extended coverage |
You may print a list of your Coverages.
Select
Coverage types from the Reports, Master info menu.
The following screen displays:

From this screen you can define the range of Coverages that you wish to print.
Warranty programs are applicable for serialized and warranty items only.
A warranty is a promise to the customer in the event something goes wrong with their product. Warranties can and will vary, depending on the product purchased and which warranty you associate with the product.
Define the warranty and provide a description. You can select up to 5 coverage types per warranty.
To enter warranty programs, follow these steps:
Select
Warranty programs from the Master information menu.
The following screen displays:
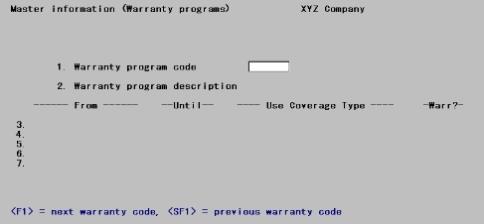
From this screen you can work with both new and existing Warranty programs. Enter the information as follows:
1. Warranty program code
Options
Enter the Warranty program code, or use one of the options:
|
<F1> |
For the next Warranty program |
|
<SF1> |
For the previous Warranty program |
|
Format |
six characters |
|
Example |
Type Extend |
2. Description
Enter the Warranty program description.
|
Format |
Two lines of 25 characters each |
|
Example |
Type Extended warranty |
3. through 7.
Field #3 through #7 ask what the start date, or continued date of the coverage is. When does it start, how long is this coverage for, what is the coverage (this coverage must be on file under coverages) and if it is warranted by the manufacturer or not.
You should always have a coverage type of none. If you do not have 5 coverages for a warranty, and the last coverage you enter does not go into the future (forever), then you will need a coverage type of none. You should also always have a warranty program of none, because serialized and warranted items require a warranty be associated with each. Also, there may not be an actual warranty for the item.
|
Example |
You could have extended coverage for 30 days, then up to 90 days have parts coverage only and after that, no coverage at all. So in this case, we would use the Extend coverage for the first 30 days, the Parts coverage for the next 60 days and the None coverage for the future. |
The warranty flag denotes whether or not this warranty is covered by the manufacturer or yourself.
From
The first entry will always be Warranty start date. The values for the remaining lines are automatically created. It is the combination of the Until and Unit of the previous line plus one day.
Until
Enter the number of Days, Weeks, Months, or Years the coverage type will be in effect. In order to end a warranty program a coverage type that has no coverage categories associated with it must be entered for an Indefinite future.
|
Format |
3 digits |
|
Example |
Type 90 |
(Unit of time)
Enter the unit of either Days, Weeks, Months, or Years the coverage type will be in effect.
|
Format |
1 character, either D, W, M or Y |
|
Example |
Type D |
Use coverage type
Enter the coverage type code to include in the warranty program.
|
Format |
6 character |
|
Example |
Type Extend |
Warr?
Type Y if this coverage is provided by the manufacturer of the item. Otherwise, type N.
|
Format |
1 character, either Y or N |
|
Example |
Type N |
Field number to change ?
Make any changes or select Enter to save the record.
You may print a list of your Warranty programs.
Select
Warranty programs from the Reports, Master info menu.
The following screen displays:
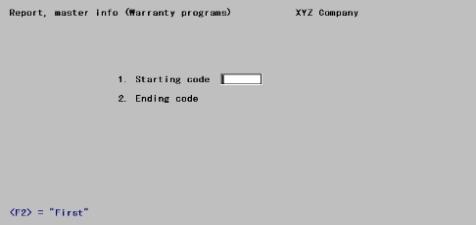
From this screen you can define the range of Warranty programs that you wish to print.