This chapter contains the following topic:
Printing Physical Count Worksheets
This chapter explains the Physical Count Worksheet that is printed when the Normal physical count method was specified in Control information. If you specified the Expanded physical count method, refer to the Expanded Physical Count chapter.
Use this selection to print a Physical Count Worksheet, which lists your inventory items by location within a selected warehouse. Serial numbers and lot numbers may be optionally printed.
You can then use this work-sheet to do an actual physical count.
Select
Worksheet from the Physical count menu.
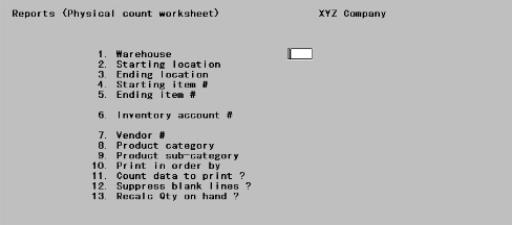
The following screen displays:
Enter the information as follows:
1. Warehouse
If you are using multi-warehousing, enter the warehouse code for which you want the worksheet printed press for the Central warehouse.
|
Format |
Up to two characters |
|
Example |
Press <Enter> for Central warehouse. |
If you are not using multi-warehousing, you will not see the Warehouse field and all field numbers will be one less than the numbers shown.
2. Starting location and
3. Ending location
Enter the range of locations to include on the worksheet. Press <F2> for First and Last in both fields.
|
Format |
Up to four characters |
|
Example |
<F2> then press <Enter> in both fields. |
4. Starting item # and
5. Ending item #
Enter the range of item numbers to include on the worksheet. Press <F2> for First and Last in both fields.
|
Format |
Up to 15 digits |
|
Example |
<F2> then press <Enter> in both fields. |
6. Inventory account #
Enter the inventory account for which to print the worksheet.
Options
You may also use one of the options:
|
<F1> |
For the next inventory account |
|
<SF1> |
For the previous inventory account |
|
<F2> |
For the default inventory account |
|
<F5> |
For All inventory accounts |
|
Example |
Press <F5> for All accounts. |
7. Vendor #
Enter the vendor number to print the worksheet for only one vendor, or press <F5> for All vendors numbers.
|
Format |
Up to six digits or use the option |
|
Example |
Press <F5> for All vendors numbers. |
8. Product category
Enter the category to print the worksheet for only one product category, or press <F5> for All categories.
|
Format |
Up to five characters or use the option |
|
Example |
Press <F5> for All categories. |
9. Product sub-category
Enter the sub-category to print the worksheet for only one product sub-category, or press <F5> for All sub-categories.
|
Format |
Up to five characters or use the option |
|
Example |
Press <F5> for All sub-categories. |
10. Serial/lot data to print
Options
Select to print by one of the following:
|
S |
Serial numbers |
|
L |
Lot numbers |
|
B |
Both |
|
N |
None |
|
Example |
Type: N |
11. Print quantities on hand ?
Options
Enter if you want to count data to print on the report, the option are:
Answer Y or N.
|
Format |
One letter either Y or N. The default is Y. |
|
Example |
Type: Y |
12. Suppress blank lines?
Answer Y to eliminate blank lines between items on the worksheet.
Answer N to skip one line prior to printing an items on the worksheet.
|
Format |
One letter either Y or N. The default is Y. |
|
Example |
Press <Enter> to accept the default. |
Field number to change ?
Select <Enter> to print the report.