This chapter contains the following topics:
The Ship-via selection lets you maintain a list of standard codes for the carriers you use to ship your merchandise (e.g., A/F for shipping Air Freight). The purpose is to minimize keystrokes needed when entering invoices.
If you have specified (in Control information) that you do not use ship-via information, this chapter does not apply to you.
You can optionally assign a default ship-via code to a customer in the Customers selection.
The ship-via codes entered here are also used in the Passport Business Solutions Order Entry module for entering orders.
If you are going to use the UPS address export utility to export address information there is a specific data entry format for the city, state and zip information. Read the UPS Address Export chapter for details.
Select
Ship-via from the Master information menu.
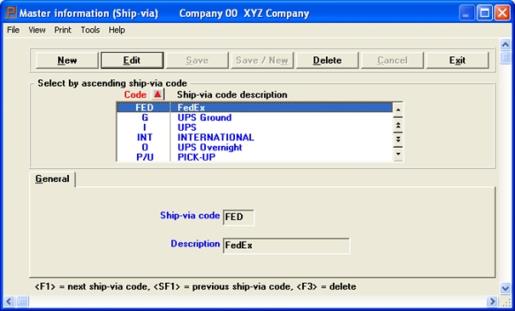
The following screen appears:
Graphical Mode

The list box displays up to 6 ship vias at a time. You may sort the ship vias by ship via code in ascending or descending order. Only column names in red may be sorted. To select or change the sort field direction, click on the column name or the arrow to the right of the column name or use the View menu options.
To locate an ship via, start typing the number or use the arrow keys, <PgDn>/<PgUp>, and <Home>/<End> keys to find the account. The <F1> and <SF1> keys function the same as the up/down arrow keys.
Ship vias that display in the list box are available for changes or deletion. The fields for the selected ship via display in the lower part of the screen.
When a ship via is found, you may select the <Enter> key or Edit button to start editing.
You have the following options with the buttons and keyboard equivalents:
| Button | Keyboard | Description |
|---|---|---|
|
New |
Alt+n |
For entering a new ship via |
|
Edit |
Alt+e |
For editing an existing ship via |
|
Save |
Alt+s |
For saving a new ship via or for saving the changes to an existing ship via |
|
Save/New |
Alt+w |
This is a combination of the Save and New buttons |
|
Delete |
Alt+d |
To delete an ship via that is highlighted in the list box. You may also select the <F3> key |
|
Cancel |
Alt+c |
To cancel adding or editing a ship via. Your entry will not be saved and the record will revert back to its previous state |
|
Exit |
Alt+x |
To exit the window and return to the menu |
There are several menu selections that are common to every screen and some that are unique to a screen. See the System documentation for a description of the common menu selections. The Print menu selection is unique to this screen as it allows you to print a list of ship vias. See Printing Ship-via Codes
For general users, the menu selections can and may be restricted based on the assigned menu.
Character Mode

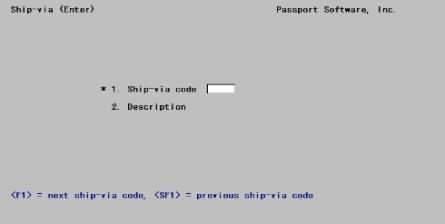
From the screen which appears, you can work with both new and existing ship-via’s. If the entry already is on file, it will appear and be available for changes or deletion.
Enter the following information:
Options
Enter a ship-via code, or use one of the options:
|
<F1> |
For the next ship-via code on file |
|
<SF1> |
For the previous ship-via-code |
|
Format |
3 characters |
|
Example |
Type A |
Enter a verbal description of this code.
|
Format |
15 characters |
|
Example |
Type Air Freight |
Make any needed changes and select the Save button when finished. See Ship Via Buttons for other options.
Character Mode
Field number to change ?
Options
Make any needed changes, or use one of the options:
|
<F1> |
For the next ship-via entry on file |
|
<SF1> |
For the previous entry |
|
<F3> |
To delete an existing entry |
You may view a Ship Via Code List example in the Sample Reports appendix.
Select
Ship-via from the Reports, general menu.
No selection screen appears; all ship-via codes are listed unconditionally.