This chapter contains the following topics:
The Invoices selection lets you enter, list, print, and post invoices and credit memos.
The normal sequence is to enter an invoice, print it, and then post it.
| • | You may not post an invoice until it has been printed. |
| • | You may print an invoice more than once before posting it. |
| • | Until an invoice has been posted, you may change or delete it as required even if it has been printed. |
An alternate approach is to print the invoice as you enter it. This feature, adapted to point-of-sale transactions, is called immediate printing. The feature is optional; to use it, you must have authorized it beforehand in Control information, and you must have dedicated an invoicing station to this operator at the start of this invoicing session. Immediate invoices, like regular invoices, must be posted after they have been printed. See the Print immediately field in Control information.
An edit list of invoices entered but not yet posted may be printed at any time, whether or not the invoices have been printed. Edit lists are optional, and are not a prerequisite for either printing or posting.
You may also use Invoices (Reprint) to reprint an invoice that has already been posted, provided that you have chosen to keep invoice history and that the invoice has not been purged.
Invoices can be configured to interface to Inventory Control. It cannot be configured to interface to Inventory Management.
The Invoices selection produces physical documents (invoices and credit memos) to be delivered to your customer, either separately or packed with the merchandise. Of course, it also handles the accounting transactions, checks the customer’s credit (if desired), maintains the inventory (if interfaced to I/C), and does numerous other things. Printed invoices are posted to A/R open items and A/R invoice history.
If your business does not require such documents (for instance, if your customers are all walk-ins), you are not required to produce them. The Miscellaneous charges selection lets you enter an invoice without printing a physical document; it does not however break out individual line items, nor does it interface to I/C. See the Miscellaneous Charges chapter. Miscellaneous charges entries are posted to A/R open items only, but they do not post to A/R invoice history.
You do not have to choose one method or the other exclusively but can use both as appropriate.
Statements are physical documents sent to a customer at regular intervals, summarizing his account balance and listing his invoices, payments, and other transactions. You can produce both invoices and statements, or use either without the other. You may print statements with invoices as well.
Credit checking is done as invoices are entered, provided that you have checked the box to the Do credit checking field in Control information. The customer’s account balance (including pending unposted transactions) is compared to his credit limit as each line item is entered.
As soon as the credit limit is reached, you are so notified and given the choice of canceling the invoice, canceling this line item only (if that is what you are currently entering), or continuing anyway. If you choose the latter, credit checking is suspended for the remainder of the invoice.
Credit checking does not occur on credit memos, only on invoices.
The credit hold feature is separate from the credit limit feature. If a customer is on credit hold you cannot enter an invoice for him at all. See the Credit hold field in Customers.
For cash transactions to one-time customer, you may want to define a generic customer number. This allows all cash transactions to be saved in the Invoice History file. You could use a miscellaneous customer number (such as CASH) for this purpose, but this would still require you to enter a name and address for each invoice. Reserving a regular customer number (such as CASH) avoids this problem. As an alternative, the Point of Sale module is designed to handle cash and carry customers.
Invoices may be under batch control, which involves screens not discussed in this chapter. Refer to the Using Batch Controls chapter of the System User documentation.
If you are interfaced to the PBS Order Entry module, be aware that each module handles its own invoices. This selection does not give you access to O/E invoices. However, if you keep invoice history the same file is used to accumulate history from both modules.
Billings for a job (or sub-job) are transferred directly to the Job Cost module and need not be re-entered in that module.
The cost of each line item associated with a job is transferred to the corresponding cost item of that job indirectly, through the Inventory Control module. If you are not interfaced to I/C, such costs must be entered separately in J/C. This also means that the cost of Service line items is not transferred to J/C (since services do not form part of your inventory).
Select
Enter from the Invoices menu.
A single invoice involves data entry on three different screens: a Header Screen for the invoice as a whole, a Line Item Screen for each item, and a Totals Screen for totals, sales tax, commissions, and various charges.
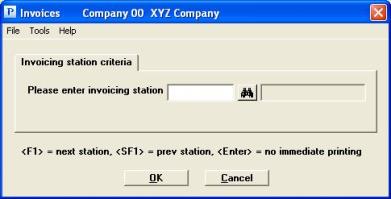
Each will be described in turn, but first we must discuss a screen that appears only at the beginning of the session and is not repeated for each invoice. This is the immediate invoicing screen, and it only appears if you have selected the check box (yes) to Print immediately in Control information. If not, skip to the next Header Screen section.
Graphical Mode
The following screen appears:

Character Mode
The following screen appears:
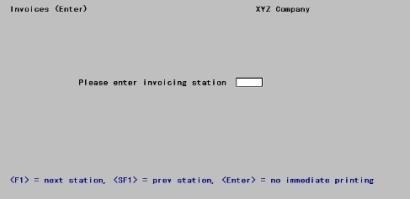
Enter the following information:
Please enter invoicing station
Options
Enter the code of a valid invoice printer control station, or use one of the options:
|
<F1> |
For the next invoice printer control station code on file |
|
<SF1> |
For the previous station |
|
Blank |
To disable immediate printing for the remainder of this invoicing session |
Selecting a station does not imply that every invoice in this session will be an immediate invoice, it merely permits you to print any invoice immediately. It is recommended (but not required) that only one operator at a time be assigned to any invoice station.
|
Format |
3 characters |
|
Example |
Type 1 |
If you select an invoicing station that has a printer designated to print PDF documents (a -PDF- printer), then a PDF file will be created for the invoice and will display on screen. The PDF file will be generated and may be available to email to the customer. See the PDF Invoices section later in this chapter. See a definition of PDF.
Select Cancel to go back to the menu or OK to begin entering invoices.
From this screen you can work with both new and existing invoice entries (sometimes called bills). Since an actual invoice number is not assigned until the invoice is printed, bills are temporarily assigned a bill reference number. Upon entry or selection of an existing bill reference number, that bill will appear and be available for changes or deletion. Upon entry or automatic assignment of a new bill reference number, you can enter complete information for a new invoice.
Graphical Mode
The header screen is the first screen of each invoice:
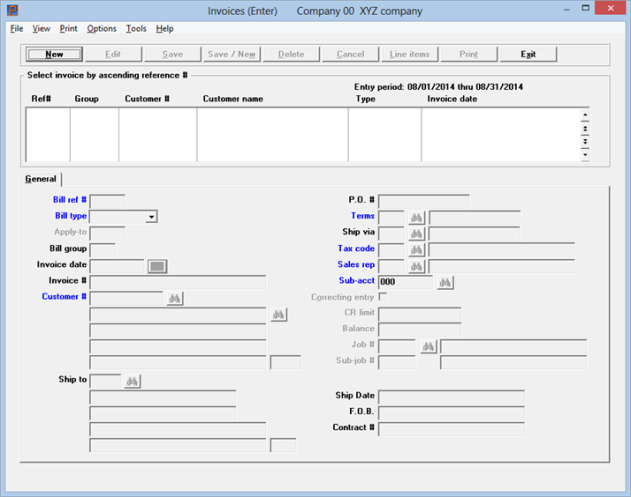
From this screen you can work with both new and existing invoices.
The list box displays up to 6 existing invoices, and credit memos, at a time. You may sort the invoices by bill reference number, group, customer number and customer name in ascending or descending order. Only column names in red may be sorted. To select or change the sort order, click on the column name or the arrow to the right of the column name or use the View options.
To locate an invoice, start typing a bill reference number or a number or name that matches the selected sort order. You may also use the up/down arrows, Page up, Page down, Home and End keys to locate an invoice. The <F1> and <SF1> keys function the same as the up/down arrow keys.
Invoices that display in the list box are available for changes or deletion. The fields for the selected invoice display in the lower part of the screen.
When an invoice is found, you may select the <Enter> key or Edit button to start editing.
Buttons
You have the following options with the buttons and keyboard equivalents:
| Button | Keyboard | Description |
|---|---|---|
|
Alt+n |
For entering a new invoice header. |
|
|
Alt+e |
For editing an existing invoice header. |
|
|
Alt+s |
For saving the addition of the new invoice header or for saving the changes to an existing invoice header. |
|
|
Alt+w |
This is a combination of the Save and New buttons. |
|
|
Alt+d |
To delete an invoice. You may also select the <F3> key to delete an invoice. |
|
|
Alt+c |
To cancel adding or editing an invoice. Your entries will not be saved. |
|
|
Alt+l |
To access the line items of an existing invoice for entering, editing or deleting them. |
|
|
Alt+t |
When you are set up for immediate printing per A/R Control information and you selected an immediate printer, this button is available to print or reprint an existing invoice immediately. See Immediate Printing. |
|
|
Alt+x |
To exit the invoice header window. |
Menu Selections
For general users, the options menu selections can and may be restricted by the assigned user menu. The Options menu selections include:
| Menu selection | Link to documentation |
|---|---|
|
View invoices |
|
|
Purge customer history |
|
|
View customers open items |
|
|
View recurring bills |
|
|
View customer history by date |
|
|
View customer history by doc # |
|
|
Invoice notes <F6> |
For general users, the print menu selections can be restricted based on the assigned menu. Under the print menu selections you may access the following:
| Menu selection | Link to documentation |
|---|---|
| Edit list | Listing Invoices |
| Invoices | Invoice Print |
| Reprint | Reprinting Invoices |
The header screen has one General tab.
Character Mode
This is the first screen of each invoice:
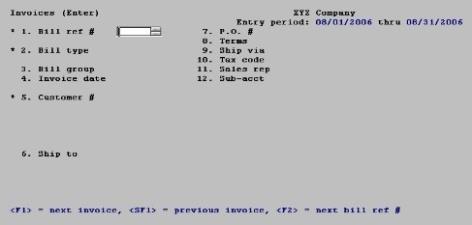
If you are using date controls, the date range (from Control information) will display in the upper right. This date range applies to the invoice date field.
Enter the following information:
Options
Enter a reference number for this invoice,
In character mode only, you may use one of these options:
|
<F1> |
For the next existing invoice entry on file |
|
<SF1> |
For the previous entry |
|
<F2> |
To enter a new invoice and assign it the next available reference number |
If this is an existing entry and the invoice has already been printed, * Already printed * appears on the screen.
|
Format |
6 characters |
|
Example |
Press <F2> |
Enter what type of bill this is: Invoice or Credit memo.
|
Format |
Drop down list, either Invoice or Credit memo. The default for the first entry of a session is Invoice; thereafter each entry’s default is whatever the previous entry was. |
|
Example |
Press <Enter> |
This field may only be entered for credit memos. If this is a credit for a specific invoice, enter the number of that invoice. This field is optional. If you leave it blank, Open displays. If you enter an invoice number, it is not checked against invoice history.
If using PBS Multi-payment processing, you must enter an apply-to number. You cannot apply a credit memo to open. You may read more about PBS Multi-payment processing and the configuration in the PBS Multi-payment Setup appendix in the A/R User documentation.
|
Format |
999999 |
|
Example |
This field does not appear for an invoice. |
Bill groups are an optional way of classifying invoices. When you come to print the invoices, you can select invoices by their group code.
If you are using batch controls, the bill group is automatically set to the number of the current batch and cannot be changed.
Options
Otherwise, enter any desired code, or leave the field blank if you do not use this feature. If you selected a station for immediate invoicing and you are not using batch control, you may also use the option in character mode:
|
<F2> |
To use the station code for this invoicing station as the bill group |
Using graphical mode and when using an invoicing station this field defaults to the invoicing station code.
|
Format |
3 characters |
|
Example |
Press <Enter> to skip this field. |
Options
Enter the date to assign to this invoice, or use one of the options:
|
<F1> |
For the same date as the previous invoice or credit memo entered; or, in the case of the first entry of the session, for the system date. |
|
<F2> |
To postpone assigning a date until the invoice is printed. |
Leaving the date blank is the same as pressing <F2>.
|
Format |
MMDDYY |
|
Example |
Type 30505 |
You may be warned or stopped against entering a date that is outside the allowed date range. For more information, read about Date Control in the Control information chapter.
Options
Enter the number of the customer for this invoice, or use one of the options:
|
<F1> |
For the next customer on file |
|
<SF1> |
For the previous customer |
|
<F2> |
For the same customer as the invoice or credit memo previously entered (unless this is the first entry of the session) |
|
Blank |
To look up the customer by name |
You may also locate, edit or add a customer via the customer lookup. For more information about the lookup functions see Customer Lookup.
|
Format |
12 characters |
|
Example |
Type AJI (a customer number which is not used yet, since we are going to enter a new customer). |
Options
If you have left the customer number blank, the cursor will move to the name field to permit selection by customer name.
Enter the customer name, or the leading characters of the name; or use one of the options:
|
<F1> |
For the next customer on file, in customer name sequence |
|
<SF1> |
For the previous customer |
|
Blank |
To revert to selecting the customer by his number |
You may also locate, edit or add a customer via the customer lookup. For more information about the lookup functions see Customer Lookup.
|
Format |
25 characters |
|
Example |
(Does not occur in this example because you have already selected the customer by number.) |
Miscellaneous Customer
Existing miscellaneous customers may be entered, or selected with the option keys. These customers have numbers beginning with an asterisk (*) and have been described in the Miscellaneous customers section of the Customers chapter.
By definition a miscellaneous customer number represents a category of customers and not an individual customer, so you can enter a different name and address each time that number is used.
Miscellaneous Customer Name
Options
Enter the name of this customer. This may be left blank. You may also use the option:
|
<F2> |
To toggle between entering a personal name or a corporate name. Initially this is set to corporate name. |
|
Format |
25 characters |
|
Example |
(Does not appear in this example) |
Entering a Person’s Name
If you have pressed <F2> at the preceding field when entering a miscellaneous customer, the Name field splits into two subfields allowing entry of a personal name and a surname.
Options
Enter the individual’s first name (and middle initial if you wish); or use the following option:
|
<F2> |
To revert to entering a corporate name |
|
Format |
10 characters |
|
Example |
(Does not occur in this example because you have entered a corporate name) |
Enter the customer’s surname.
|
Format |
14 characters |
|
Example |
(Does not occur in this example) |
Miscellaneous Customer Address
Each line is optional and may be left blank.
|
Format |
25 characters for the name |
|
|
25 characters for address line 1 |
|
|
30 characters for address line 2 |
|
|
3 characters for country |
|
|
30 characters for address line 3 |
|
Example |
(Does not appear in this example) |
As soon as a customer is identified (other than a miscellaneous customer or a customer added on-the-fly), the customer credit is checked.
When you access the Customers lookup and if you have access to the Customers menu selection you may select the Customers button to add a new customer. You will have access to all the fields which is an advantage over adding a customer on-the-fly. For more information about the lookup functions see Customer Lookup. If you do not have access to the Customers menu selection you must use the add-customer-on-the-fly process to add your customer.
This customer is not on file — would you like to add it ?
This question appears when you enter a customer number (regular or miscellaneous) that is not already on file. Select No to correct an erroneous entry, or Yes to add the new customer on-the-fly.
|
Format |
Yes/No button window |
|
Example |
Select Yes |
|
Note |
If the customer is already on file, proceed to the Ship to field. |
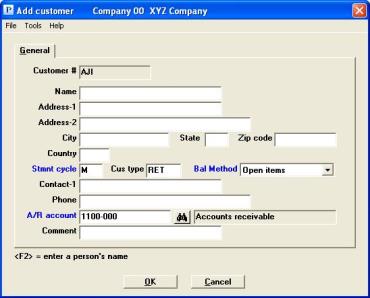
Graphical Mode
The following window appears:
Character Mode
The following window appears on the screen:
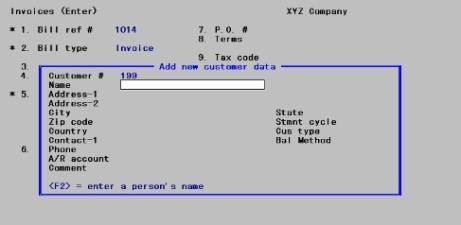
From this screen you can work with new entries only. The effect is as though you had gone into the Customers (Enter) selection and entered a new customer there. This is the case even though your password may not authorize you to use that selection.
Be aware that not every field on the Customers screen appears on this screen:
| • | Some fields, such as Contact-2, are omitted altogether. |
| • | Other fields will be supplied automatically from your entries in the remainder of this invoice. These include: terms code, ship-via code, tax code, sales representative, and cost center. |
| • | The credit limit is automatically set to zero, but this invoice does not set off the credit limit check. The next invoice for this customer will. |
If necessary, you can use Customers (Enter) to change this new customer after adding him here.
Enter the following information:
Enter the customer’s name. Name is optional, but omitting customer names is not recommended. You may use the <F2> option to enter a personal name as opposed to a corporate name, as described above for miscellaneous customers.
|
Format |
25 characters |
|
Example |
Type AJI, Inc. |
Enter two lines of customer address. All address fields are optional.
|
Format |
30 characters at each field |
|
Example |
Type 15 West Eire Ave. Type Suite 101 |
Enter the remainder of the customer address.
|
Format |
15 characters for city |
|
2 characters for state |
10 characters for zip |
|
Example |
Type Chicago |
|
Type IL |
Type 60600 |
Enter a country code for the customer.
|
Format |
3 characters |
|
Example |
Press <Enter> |
Enter the statement cycle code which specifies how often statements are to be printed for this customer, such as W (weekly), M (monthly), or Q (quarterly). This field is required.
|
Format |
One character. The default is whatever has been defined in the Customer on the fly defaults box of Control information. |
|
Example |
Press <Enter> |
If you plan to use the PBS Sales Analysis (S/A) module, entering a customer type will enable you to evaluate sales information for different customer types, to determine their relative profitability. If you do not intend to use S/A, you might still want to categorize customers by type for your own information. Some price codes in the PBS Inventory Control module can use customer type as a basis for assigning prices.
Enter a customer type. This field is optional.
|
Format |
5 characters. The default is whatever has been defined in the Customer on the fly defaults box of Control information. |
|
Example |
Press <Enter> |
Enter the code for the method used in handling this customer’s account, either Open item or Balance forward.
For open-item customers, all payments received must be applied to a specific receivable. For balance-forward customers, payments are applied to the oldest unpaid receivables.
One-time customers should be assigned a balance method of Open item so that specific items can be selected for payment.
|
Format |
One letter. The default is whatever has been defined in the Customer on the fly defaults box of Control information |
|
Example |
Press <Enter> |
Enter the name of the person to contact at the customer’s location.
Contact name cannot be printed on invoices or quotations for a miscellaneous customer.
|
Format |
25 characters |
|
Example |
Type T.A. Wagner |
Enter the phone number of the contact entered above.
|
Format |
25 characters |
|
Example |
Type 123-456-7890 |
Options
Enter the number of the A/R account to which documents for this customer are to be posted. This must be a valid entry in A/R Accounts. You may use one of the options:
|
<F1> |
For the next A/R account on file. This option and the next are not available if only one A/R account is on file. |
|
<SF1> |
For the previous A/R account |
|
<F2> |
For the default A/R account from Control information |
|
Format |
Your standard account number format, as defined in CTL Company information |
|
Example |
Press <F2> |
Enter any comment pertaining to this customer. This field is optional.
|
Format |
25 characters |
|
Example |
Type Franchise retailer |
Select Cancel to return to the invoice entry window without saving the information about the customer, or OK to accept this new customer and to proceed to the next field on the main screen. Note that customers added on-the-fly are not actually added to Customers until you complete this invoice; if you cancel the invoice the new customer is also canceled.
Options
Enter the code for the ship-to address at which services are performed or to which goods are delivered. This must already be on file in Ship-to addresses for this customer. You may use one of the options:
|
Blank |
To make the ship-to address the same as the customer’s billing address |
|
<F1> |
For the next ship-to address on file for this customer |
|
<SF1> |
For the previous ship-to address on file for this customer |
|
<F2> |
To enter a new ship-to address |
|
Format |
99999 There is no default. |
|
Example |
Press <Enter> |
If you have pressed <F2>, enter an address for this invoice. All fields are optional.
|
Format |
25 characters for the name |
|
25 characters for address line 1 |
30 characters for address line 2 |
|
30 characters for address line 3 |
3 characters for country |
|
Example |
(Does not appear in this example) |
Do you want to save this ship-to?
If you have pressed <F2>, this question appears unless you have left the ship-to address blank or this is a customer added on-the-fly.
If you select Yes, the address just entered will be added to the Ship-to Addresses file. The next available ship-to number for this customer will be assigned automatically and will appear on the screen.
If you select no, this new ship-to address will be only for this one invoice and will not be saved.
Enter the customer purchase order number if any. This field is optional.
|
Format |
15 characters |
|
Example |
Press <Enter> |
The terms code is required and must be already be present in the Terms codes selection. See the Terms chapter.
For a balance forward customer, the customer’s usual terms code displays and cannot be changed.
Options
For an existing non-miscellaneous open-item customer, enter a terms code or use the option:
|
<F2> |
For the customer’s usual terms code |
Options
For a miscellaneous customer or a customer added on-the-fly, enter a terms code or use one of the options:
|
<F1> |
For the next terms code on file |
|
<SF1> |
For the previous terms code |
|
Format |
3 characters. There is no default. |
|
Example |
Press <F1>, then press <Enter> |
This field appears only if the Use ship-vias field in Control information is checked.
The ship-via code identifies what carrier you will use to ship the goods. This field is optional and may be left blank, but if entered it must be a valid entry in Ship-via codes.
Options
For an existing non-miscellaneous customer, enter a ship-via code or use the option:
|
<F2> |
For the customer’s usual ship-via code. If none has been specified in Customers, this option is not available. |
Options
For a miscellaneous customer or a customer added on-the-fly, enter a ship-via code or use one of the options
|
<F1> |
For the next ship-via code on file |
|
<SF1> |
For the previous ship-via code |
|
Format |
3 characters |
|
Example |
Press <F2>, then press <Enter> |
This field is required and must be an existing entry in Tax codes. See the Tax Codes chapter. Enter a tax code, or use one of the options:
Options
For an existing non-miscellaneous customer, enter a tax code or use the option:
|
<F2> |
For the default tax code: If the ship-to address is the same as the bill-to address, the customer’s tax code is the default. If this is being shipped to an existing ship-to address, that address’s tax code is the default. If the ship-to address is neither the bill-to address nor any existing ship-to address, the customer’s tax code is the default. |
Options
For a miscellaneous customer or a customer added on-the-fly, enter a tax code or use one of the options:
|
<F1> |
For the next tax code on file |
|
<SF1> |
For the previous tax code |
|
Format |
3 characters |
|
Example |
Press <F2>, then press <Enter> |
This field appears only if the A/R Control information Use sales reps field specifies that sales representatives are used. If so, the field is required and must be a valid entry from the Sales reps selection. See the Sales Reps chapter.
Options
For an existing non-miscellaneous customer, enter a sales representative code or use the option:
|
<F2> |
For this customer’s default sales representative |
Options
For a miscellaneous customer or a customer added on-the-fly, enter a sales representative code or use one of the options:
|
<F1> |
For the next sales representative on file |
|
<SF1> |
For the previous sales representative |
|
Format |
3 characters |
|
Example |
Press <F2>, then press <Enter> |
Cost ctr appears only if Control information specifies that multiple cost centers are used. If so a cost center is required and each segment of it must be on file in the Cost centers selection of the System application - Ctl on the menu. Note that zero or blank may be a valid entry if so defined in Cost centers. If cost centers are not used, but sub-accounts are used, sub-acct displays.
Options
Enter the cost center or sub-accts to which this invoice is assigned, or use the option:
|
<F2> |
For the default cost center or sub-account from Control information or the default cost center from Customers (depending on what your answer has been to the question Assign cost ctrs (or sub-accts) by in Control information) |
|
Format |
Your standard cost center or sub-account format, as defined in Company information |
|
Example |
Press <F2> |
If this is a new entry and you are interfaced to G/L and you have answered Y to the question Allow correcting transactions ? in G/L Control information, you may select the <Space bar> to check this box to make it a correcting entry. Otherwise, leave it unchecked.
|
Format |
Check box, checked is yes and unchecked is no |
|
Example |
Leave it unchecked |
If Job Cost is not interfaced, this field cannot be entered.
If this is a miscellaneous customer or a balance-forward customer, this field may not be entered. Only open-item customers can be billed for jobs (since the payment when received must be applied to that job).
If billing for a job, enter the job number of an active or closed job already on file in the Job Cost module. This may not be a job in the Inactive Files.
If this invoice is not for a job, leave this field blank. This field and the next will display as Not applicable.
Options
You may use the one of the options:
|
<F1> |
For the next job on file in the Job Cost module |
|
<SF1> |
For the previous job |
|
<F2> |
To indicate the invoice is for multiple jobs (you will be asked for a job number for each line item, and you will not be able to enter Standard Bill line items) |
You may bill a customer for a job even though that job is a for a different customer than this invoice.
|
Format |
7 characters. There is no default. |
|
Example |
Press <Enter> |
If Job Cost is not interfaced, this field cannot be entered.
If you have entered a job number in the previous field, and that job is broken down into sub-jobs, and those sub-jobs are billed separately, enter the number of the sub-job you are billing.
Options
You may use one of the options:
|
<F1> |
For this job’s next sub-job |
|
<SF1> |
For this job’s previous sub-job |
|
Format |
3 characters. There is no default. |
|
Example |
(In this example the cursor does not move to this field) |
The next screen is the Line Item Screen.
1st user-defined field
2nd user-defined field
3rd user-defined field
These fields appear only if it is defined in Control information. If present, the caption that displays, and the number of characters expected, is whatever you have defined in the A/R Optional fields section of Control information.
Note that the user-defined fields are alphanumeric, not date or numeric fields. Whatever you enter will appear exactly that way on the invoice.
Enter the information appropriate to the field.
|
Format |
Number of characters specified in Control information |
|
Example |
Type 3/15/05 as the Ship date. |
This completes the first screen. Make any needed changes. Note that you cannot change the bill reference number or customer number fields, even for a new entry.
Options
If this is an existing entry, you may use one of the options:
|
<F1> |
For the next existing invoice entry on file. |
|
<SF1> |
For the previous entry |
|
<F3> |
To delete this entry |
Correcting Entries for Character Mode
Options
If this is a new entry and you are interfaced to G/L and you have answered Y to the question Allow correcting transactions ? in G/L Control information, you may use the option:
|
<F5> |
To toggle between making this a correcting entry and not doing so. Correcting entries are identified as such in the upper right of the screen. The default is that credit memos are correcting entries and invoices are not. |
What happens when you press <Enter> depends on whether this is an existing entry or a new entry:
| • | For a new invoice, the line-item screen appears automatically |
| • | For an existing invoice: |
If you have changed the tax code, the existing line-item screens appear in succession so you can correct the taxability of each one.
If you have not done so, you are asked, Do you wish to change the line items ?.
Answer N to terminate processing this invoice and proceed to another entry.
Answer Y to view the line items or the totals screen.
Each line item of the invoice is entered on a separate screen.
| • | An invoice may have up to 9,999 line items. Typically it has at least one, but it may have none at all (for instance, to correct an erroneous freight charge on a previous invoice). |
| • | The term line item should not be taken literally to mean a single line on the invoice as printed; depending on your invoice design, teach line item may occupy several lines. |
| • | To terminate processing line items and proceed to the totals screen, in character mode press <Esc> from the Sequence # field of any line-item screen and in graphical mode select the Exit button or select alt+x. |
| • | Some of the fields illustrated for Goods and Services line items may not be accessible on your screen, depending on your choices in Control information and Company information. When this happens in character mode the remaining fields on the screen are renumbered. In graphical mode the fields that are inaccessible display, but cannot be entered. |
Graphical Mode
The following screen appears:
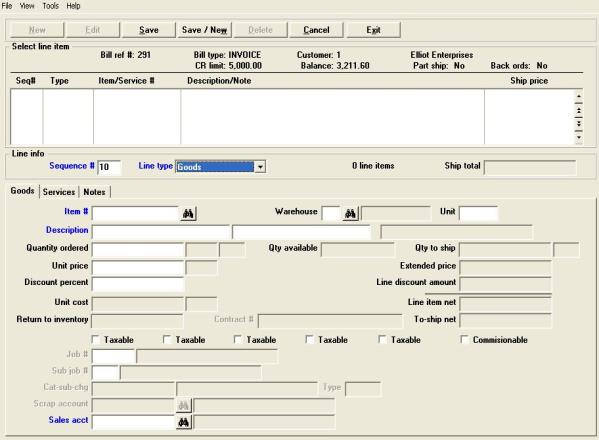
From this screen you can work with both new and existing invoice lines.
Up to 6 existing invoice lines display in the list box. You may sort the lines by sequence number or type both in ascending or descending order. Click the arrow to the right of the column name to change the sort or use the View menu options. Only Red fields may be sorted.
To locate a line, start typing the sequence number or type depending on which column is selected.
You may also use the up/down arrows, Page up, Page down, Home and End keys to locate a line. When adding a line or scanning through the invoice lines, the corresponding tab will display based on the Line type.
You have the following button and keyboard equivalent options:
| Button | Keyboard | Description |
|---|---|---|
|
New |
Alt+n |
For entering a new invoice line. |
|
Edit |
Alt+e |
For editing an existing invoice line. |
|
Save |
Alt+s |
For saving the addition of the new invoice line or for saving the changes to an existing invoice line. |
|
Save/New |
Alt+w |
This is a combination of the Save and New buttons. |
|
Delete |
Alt+d |
To delete an invoice line. You may also select the <F3> key to delete a line item. |
|
Cancel |
Alt+c |
To cancel adding or editing an invoice line. Your entries will not be saved. |
|
Exit |
Alt+x |
To exit the invoice line window. The totals tab will display next. |
Character Mode
The following screen appears:
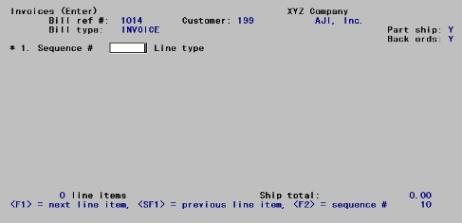
From this screen you can work with both new and existing line items.
Enter the information as follows:
Line items within an invoice are in sequence by an arbitrary number, which by default is assigned in increments of ten. This lets you insert new lines between existing lines. For example, to insert a line item between #10 and #20, give it any sequence number from 11 to 19 (preferably 15, to allow room for still later insertions on either side).
If you change the first line number to 1, then by default that invoice will increment with single digits. For example, you enter the first line as 1, then second new line will be 2. If you want to increment by 1 for another invoice, then you will have to change the sequence number from 10 to 1.
When going back to edit an existing order, if the first line sequence number is 1, then the sequence # for lines added will be incremented by 1. Note that if a user adds a line to an invoice with no line sequence 1, and changes the default sequence# to 1, then next time the user edits this invoice, as long as line sequence # 1 is present, new lines will be offered a sequence # incremented by 1. Reversely, if the first line sequence# is 10, the next time the user edits this invoice, new lines will be offered a sequence # incremented by 10. In any case the user can manually change the sequence # when adding a line.
Options
Enter a sequence number, or use one of the options:
|
<F1> |
For the next existing line item, if any |
|
<SF1> |
For the previous existing line item |
|
<F2> |
For a new line item, to be added at the end of the invoice and to be given a sequence number ending in zero |
Normal practice when entering a new invoice is to use <F2> for each line item.
If you select an existing line item (either by direct entry of a sequence number or by using the option keys), that item is displayed in the appropriate format.
|
Format |
9999 |
|
Example |
Press <F2> to assign sequence number 10. |
Enter the type of line item:
|
Goods |
Goods are merchandise such as parts, books, appliances, etc. Entering this line item when interfaced to the PBS Inventory Control module is considerably different than when not, so each case is discussed separately. See either Goods Line Items (With I/C) orGoods Line Items (Without I/C) |
|
Services |
Services are usually billed by unit of time. See Services Line Items |
|
Notes |
Notes are a comment that prints at this point on the invoice. See Notes Line Items |
|
Standard Bill |
A Standard bill is a predefined group of line items that you can paste into the invoice. See Standard Bill Line Items |
There is no separate line type for jobs. If you are interfaced to the PBS Job Cost module and are billing for a job, you can use either a Goods line or a Services line.
After you enter a line that is a service or an item, the next new line defaults to the same line type you just entered.
As soon as you enter a line type the remainder of the screen fills out in the format appropriate for that line item. Each will be discussed in a separate section, beginning with Goods.
|
Format |
Drop down list. |
|
Example |
Select Goods |
If you are not interfaced to the PBS Inventory Control module, do not use this section.
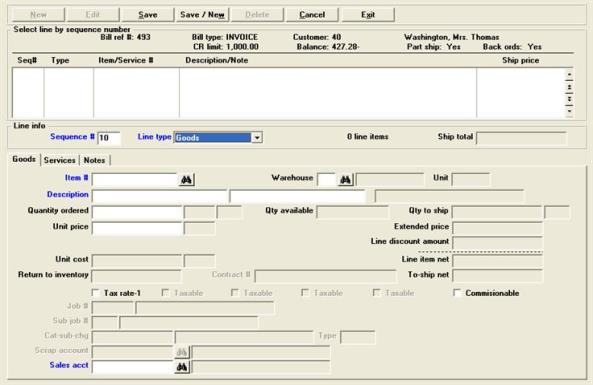
Graphical Mode
When the line entry screen displays, the sequence number is filled in and the Line type defaults to Goods.
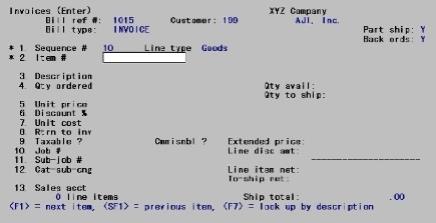
Character Mode
After pressing <F2> for the Sequence # and typing G for the Line type, the screen appears thus: Enter the following information:
Options
Enter the inventory item number. This item (even a miscellaneous item) must be on file in I/C Items. However, it must not be a serialized or lot item; these can only be sold through O/E. You may use one of the options:
|
<F1> |
For the next item on file, in item number sequence |
|
<SF1> |
For the previous item |
|
<F7> |
To look up the item by description |
You may find the item via the item lookup by selecting either the <F8> key or clicking on the binoculars. The lookup has options for selecting, viewing, modifying, adding and deleting items. These options are accessible via buttons. Some of the functions are also available from the Options menu. Here is an example of the lookup:
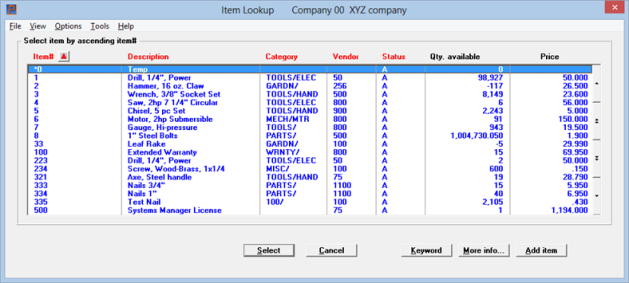
The lookup options include:
Select
This returns the item to the item number field.
Cancel
This puts the focus back to the screen without returning an item number.
Keyword
This displays a windows that allows you to do a keyword search. For more information on the use and set up of keywords, see the Item searched by section in I/C Control Information documentation.
More info...
This allows you to view the item selected in the lookup via the same screen used in Items (Enter). You may not edit the item. If the button is grayed out you do not have permission to access Items (Enter).
Add item
This button allows you to go to the Items (Enter) where you may view, edit, add or delete items. If the button is grayed out you do not have permission to access Items (Enter).
Item Lookup By Description
Options
If you pressed <F7>, the cursor moves to the Description field. Enter the item’s description (or any portion of it beginning with the first letter). Your options are:
|
<F1> |
For the next item on file, in item name sequence |
|
<SF1> |
For the previous item |
|
<Enter> |
To return to lookup by number |
Only the first line of the description is used for lookup, but the full description and item number display when an item is selected by either name or number.
Miscellaneous Items
Miscellaneous items are generic low-volume items for which you do not want to maintain a separate inventory. Another use of these items is to represent intangibles such as service charges or the overhead costs associated with assembling kits. They are identified by an asterisk (*) as the first character of the item number.
If I/C does not use multi-warehousing, skip this section. Otherwise:
| • | If A/R Control information specifies that multiple warehouses are not used, you cannot enter a warehouse because the default warehouse is assumed. If the item is not stocked there you are warned of the fact but allowed to continue (you will be able to select an alternate when you come to the Quantity ordered field). |
| • | If A/R Control information specifies that multiple warehouses are used, enter the warehouse you wish to ship from. The warehouse must have been defined in I/C Warehouses (blank for Central is a valid entry), and the item must be stocked at that warehouse. |
Options
You may use the option:
|
<F2> |
For the default warehouse from Control information |
|
Format |
Two characters. |
|
Example |
Press <F2> |
This field is skipped except for miscellaneous items.
The unit or conversion factor, in effect when an invoice is entered, remains on that invoice, even if you subsequently change it using I/C Items.
Options
Enter the unit or measurement, or use the option:
|
<F2> |
For EACH |
|
Format |
4 characters |
|
Example |
(Does not occur in this example) |
For an item that is already on file and not a miscellaneous item, the description displays automatically. You can change this or press <Enter> twice to accept it as is.
If you are entering a miscellaneous item, enter the description of the item.
|
Format |
2 fields of 25 characters each |
|
Example |
Press <Enter> twice |
Enter the quantity ordered. If you leave this field blank, a quantity of 1 is assumed.
For an invoice (but not a credit memo), you can specify a negative quantity. This indicates returned goods, and requires you to specify, in a later field of this screen, how much has been scrapped and how much returned to inventory. The value of the quantity scrapped is assigned to the default scrap account specified in Control information. See the Inventory scrap acct field.
The quantity available at the current warehouse is displayed on the screen for your reference when entering the quantity ordered.
Options
You have several options:
|
<F1> |
To toggle between flagging this as a drop shipment or not. A drop shipment is delivered to the customer directly by your vendor and thus never forms part of your inventory. |
|
<F2> |
To view alternate items. |
|
<F5> |
To obtain more information about this item at this warehouse. This option is not available for miscellaneous items. |
|
<SF5> |
To see what other warehouses stock this item. This option is only available if multiple warehouses have been specified in Control information. |
|
<F7> |
If you are interfaced with I/C and the item has one or two alternate units of measure, change to the alternate prompted at the bottom of the screen. |
|
Format |
99,999,999.99999- |
|
Example |
Type 5 |
This message appears if the quantity ordered is not available at this warehouse. Use the <Space bar> to select one of the following radio buttons:
|
Radio Choices |
Description |
|
Ship in stock |
Ship the quantity available only. The Qty ordered field will change accordingly. No back-ordering will occur. |
|
Cancel |
Cancel the entire line item and clear the screen for entry of another line item. |
|
Alternate item |
To view alternate items. |
|
Override |
Ship the full quantity anyway (in anticipation of a receiving) |
OK or Cancel
Select OK to accept your choice or Cancel to go back to the quantity field.
Pressing <F2> from the Qty ordered field displays an alternate item screen. All alternates for this item stocked at this warehouse are shown. Select any listed item and then click on the Select button. This will replace your original entry in the Item number field. Press <Esc> or click on the Cancel button to return to the screen without changing the item.
Pressing <F5> from the Qty ordered field displays a window.
Graphical
A window like the following displays:
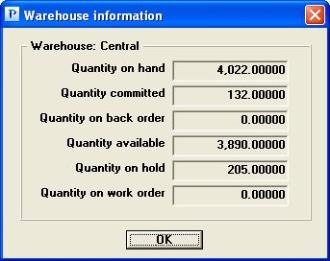
Click on the OK button or select <Enter> to return to the quantity field.
Character
The following window displays:

This shows the quantities of this item available at this warehouse. Press <F5> to return to the screen.
Pressing <SF5> from the Qty ordered field displays the window.
Graphical mode
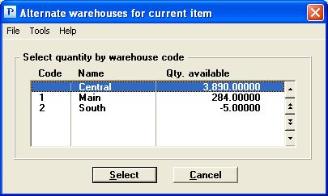
All warehouses where this item is currently stocked are shown. Use your mouse or keyboard to select the warehouse. Click on the Select button to use the warehouse or click on Cancel to return to the quantity field.
Character mode

All warehouses where this item is currently stocked are shown. Select any listed warehouse by entering its line number. This will replace your original entry in the Warehouse field. Press <Esc> to return to the screen without changing warehouses.
You may alternate <F5>and <SF5> to discover alternate items at different warehouses.
Enter the unit price. The quantity is automatically multiplied by this price and the extended price appears.
You may enter a price of zero, but will be required to confirm that you really wish to do this.
Options
Enter the unit price, or use the option:
|
<F2> |
For the default price |
In the absence of sales or contract pricing, the default price is the regular price. This is the price calculated from the item’s price code, if it has one. If it does not, the item’s Price-1 becomes the default. If pricing by warehouse is in effect, the default price is that applying at the selected warehouse.
Sales or contract pricing (or both) may apply for this item, customer, warehouse, and date. If so, the default is the lowest of the regular, sales or contract price. However, the contract price overrides the sales price if so specified in the I/C Contract prices entry.
|
Format |
999,999,999,999.99999 |
|
Example |
Press <F2> |
If the fields in the Discounts calculated on section from Control information specifies that you do not use discounts, this field is skipped. Otherwise:
| • | If you use line item discounts, this field appears as Discount %. Enter the discount percent for this line item only. |
|
Format |
999.99999 |
|
Example |
Press <Enter> |
| • | If you do not use line item discounts but do use an overall invoice discount, this field appears as Discountable. Check the box if the line item is discountable; it will be included in the total entitled to the overall invoice discount. |
|
Format |
Check box, checked is yes and unchecked is no. There is no default. |
|
Example |
(Does not occur in this example) |
| • | If you use both types of discount, you enter the line item discount percentage, not the discountability. All line items are considered discountable for the overall invoice discount. |
Customer Credit Check
As soon as the discounted amount of the line item is known, the customer credit is checked.
Replacement cost or
Average cost
Standard cost
Normally, you do not enter the unit cost field. An approximate value for the unit cost is displayed automatically, under a name which depends on the I/C inventory valuation method:
|
Valuation method |
Displays as |
|
LIFO |
Replacement cost |
|
FIFO |
Average cost |
|
Average cost |
Average cost |
|
Standard cost |
Standard cost |
This approximation is replaced by a calculated cost when the invoice is posted. For standard costing, the actual cost used is the standard cost.
The following cases are exceptions and require you to enter the cost directly. No other source is available and the information is needed to keep the cost of sales accurate and to pay commissions based on margin.
| • | Miscellaneous items |
| • | Negative line items on an invoice |
| • | All line items on a credit memo |
| • | Drop ship items |
Options
In these cases, enter the unit cost or use the option:
|
<F2> |
For the unit cost from Items. This option is not available for miscellaneous items. |
|
Format |
99,999,999.99999 |
When selling goods and services the costs and profit margin are not printed on the sales journal. It is not transferred to A/R Miscellaneous charges and it is not included as cost of sales on the sales journal.
This field is used only for returned merchandise that is, if this is a credit memo or an invoice line item with a negative quantity. Otherwise, Not applicable appears.
Enter the quantity of the items credited which are to be returned to inventory. The rest is considered scrapped.
The quantity cannot be larger than the quantity ordered in Field #4 above. For example, if the quantity ordered is -5, the quantity returned to inventory must be positive and not larger than 5.
|
Format |
99,999,999.99999 |
If the tax code in the header screen has zeros for all tax percents, this field displays as Not applicable and may not be entered.
Otherwise, the cursor does not move to this field but a default value appears. The format of this varies depending on your answer to Taxable by tax rate in Control information:
| • | If you left it unchecked, a single check box flag controls whether or not this line item is subject to all the tax rates in this invoice’s tax code. |
| • | If you checked the box, there are one to five flags separated by slashes — one for each of the tax rates in that tax code. |
Each flag is either checked or unchecked, corresponding to the taxability code on file for this inventory item in I/C Items. Even miscellaneous items have default taxability codes.
Using character mode, if you checked the Taxable by tax rate field, a window appears and the cursor moves in succession through each tax rate in this tax code. Press Y or N to change, or <Enter> to ratify, each existing default. When all have been entered, answer Y at Any change ? to re-enter the information, or N to return to the main screen.
Whether or not you can change this default depends upon your answer to the question Taxable by line item in Control information:
| • | If you left the Taxable by line item field unchecked, you may not change this field. The overall tax for the invoice may still be changed from the totals screen once you get to it. |
| • | If you checked the Taxable by line item field, you may change the taxability. Using character mode you can only change it from Field number to change ?. |
If you left the Taxable by tax rate field unchecked, specify whether or not the item is taxable.
|
Format |
Check box, checked is yes and unchecked is no |
|
Example |
(Appears automatically) |
This field is skipped if the Use commissions field from Control information specifies that you do not use commissions.
Otherwise, the cursor does not move to this field but a default value appears.
| • | If a commission code has been defined for this item in I/C Items, the default is Y and the commission for this line item is calculated from that commission code. |
| • | Otherwise the default is N and no commission is calculated. |
You may change the default from Field number to change ?.
If you change N to Y, the commission calculated for this line item is based upon the commission percentage and method specified for either this customer or this sales representative (whichever has been specified in Control information).
|
Format |
Check box, checked is yes and unchecked is no |
|
Example |
(Appears automatically in this example) |
If you are not interfaced to the PBS Job Cost module, this field does not appear on the screen.
If the header screen indicates that this invoice is not for a job at all, this field is skipped and N/A displays automatically.
If the header screen indicates that this invoice is for a single job, the job number entered on the header screen displays here and this field is skipped.
Options
If the header screen indicates that this invoice is for multiple jobs, enter the job number for this line item. This must be an active or closed job. You may also use one of the options:
|
<F1> |
For the next job on file |
|
<SF1> |
For the previous job |
|
Blank |
If this line item is not for a job |
|
Format |
7 characters |
|
Example |
[This field cannot be entered, since J/C is not interfaced.] |
Job & Sub-job Descriptions
During entry of this field and the next two, a box displays the names of the job, sub-job, and cost item.
If this invoice or this line item of the invoice is not for a job, or is for a single job which either does not have sub-jobs or does not bill for them, this field is skipped and N/A displays automatically.
If this invoice is for a single job which uses and bills for sub-jobs, the sub-job number you entered on the header screen displays automatically.
If this invoice is for multiple jobs and this line item is for a job which uses sub-jobs and which bills for them, a sub-job number must be entered.
Options
Enter the sub-job number for this line item, or use one of the option
|
<F1> |
For the next sub-job of this job |
|
<SF1> |
For the previous sub-job |
|
Format |
999 |
|
Example |
[This field cannot be entered, since J/C is not interfaced.] |
This field is the cost item, and displays on the screen only if you are using both J/C and I/C. If you have specified (in J/C Control information) that you do not use change orders, the field appears as Cat-sub instead of Cat-sub-chg.
Enter the cost item of the job to which you want the cost of this inventory item to go. When this invoice is posted, the inventory cost for this line item will automatically be transferred to I/C. When I/C Inventory is posted the cost will then be transferred to J/C.
If this line item or this invoice is not for a job, this field will be skipped and N/A will appear instead.
You may leave this field blank to postpone transferring the cost. If you are interfaced to the PBS Accounts Payable module, you can transfer the cost to the job when you pay for the item in A/P Payables.
If this is a drop shipment or a miscellaneous item, this field is also skipped (because the item is not in I/C at all), and the cost can only be transferred in A/P.
Options
Enter a cost item, or use one of the following options:
|
<F1> |
For the next cost item for this job |
|
Format |
Three segments, as follows: |
|
|
999999 Cost category number |
|
|
999 Sub-job number. If there is none, this displays as zero. If there is a sub-job number in the preceding field, that number appears here automatically and cannot be changed. |
|
|
999 Change order number. If you do not use change orders, this segment does not appear. |
This field appears on the screen only if quantity returned to inventory is present and is less than the quantity credited. This can happen on any line of a credit memo, but on an invoice it happens only when the Qty ordered field is negative.
Options
Enter the account number to which the value of the scrapped goods is to be assigned, or use the option:
|
<F2> |
For the default scrap account from Control information |
|
Format |
Your standard account number format, as defined in Company information |
|
Example |
(Does not occur in this example) |
This field appears on the screen only if Control information specifies that sales are distributed manually. If not, the sale amount is automatically distributed to the default.
If present, this field appears as sales account if this is an invoice, or as credit account if this is a credit memo.
Returned merchandise should be credited to the same account it was originally sold from, whether on an invoice or a credit memo.
On initial entry the cursor does not move to this field and the default displays automatically. You may still change the account from Field number to change ?. You must change the account if the default is not a valid entry in Valid G/L accounts.
What constitutes the default depends on your answer to the question Multiple cost centers ? in Control information and on whether or not this line item is for a job. There are three cases:
| • | You are not using multiple cost centers and this line item is not for a job.The default is the sales account specified for this inventory item within I/C Items. Only the main account (and sub-account, if defined) are entered; the default cost center from Control information is automatically prefixed. |
Options
You may use one of the options:
|
<F1> |
For the next sales account from Control information |
|
<SF1> |
For the previous sales account |
These options are not available if no sales accounts are defined in Control information.
| • | You are using multiple cost centers and this line item is not for a job.The default is the sales account for this item Items, prefixed by the cost center from either the invoice header or the item (depending on your answer to Assign cost ctrs (or sub-accts) by in Control information). |
Options
You may use the option:
|
<F2> |
For the default account |
| • | This line item is for a job. The default is this job’s billing account from J/C Job descriptions (Jobs). |
Options
You may use the option:
|
<F2> |
For the default account |
|
Format |
Either full account number format or main/sub format, as described above. |
|
Example |
(Does not occur in this example) |
Options
Change any field as desired, then press <Enter> to process another line item. For an existing line item, you may also use one of the options:
|
<F3> |
To delete this line item |
|
<F5> |
To obtain more information about this item at this warehouse. This option is not available for miscellaneous items. |
|
<SF5> |
To show the job description (if this line item is for a job). Press <SF5> again to close the window. |
If you are interfaced to the PBS Inventory Control module, do not use this section.
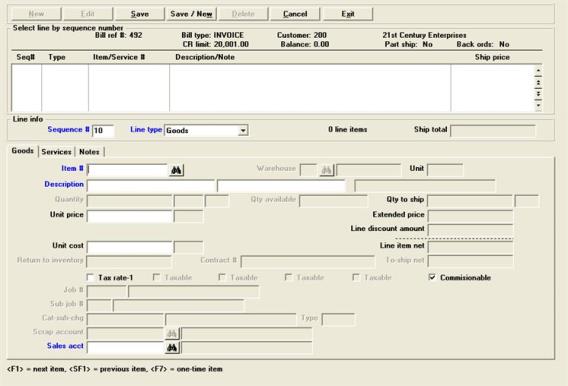
Graphical Mode
The sequence number fills in automatically. The default is Goods for the Line type.
Character Mode
After pressing <F2>for the Sequence # and typing G for the Line type, the screen appears thus:
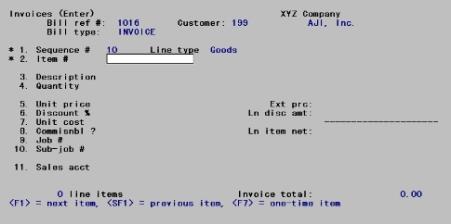
Enter the following information:
Options
Enter the item number as entered in Goods and services, or use one of the options:
|
<F1> |
For the next goods entry in the Goods/Services selection |
|
<SF1> |
For the previous entry |
|
<F7> |
For a one-time item |
A one-time item has a blank item number and is identified only by its description. It is used only on this invoice and is not added to Goods and services.
You can enter a service or good item number that is not already in Goods and services, in which case you are so informed and asked whether you want to enter it anyway.
| • | If this is merely a keying error, select No to re-enter the item number. |
| • | Select Yes to use this item number anyway. You are asked whether it should be added to Goods and services. This gives you a chance to enter new services or goods items as you go. When you enter the fields, Item/Service number, Description 1, Description 2, Unit, Price and Cost; these entries are also written to the like fields in Goods and services. |
Select No to use the item on this invoice only.
Select Yes to add the item to Goods and services. This has the same effect as using the Goods and services (Enter) selection.
|
Format |
15 characters |
|
Example |
Type 2 |
For an item already in Goods and services the description displays automatically. You can change this or press <Tab> in graphical or the <Enter> key in character, twice, to accept it as is.
If you are entering a new item, enter the description of the item.
|
Format |
2 fields of 25 characters each |
|
Example |
Press <Enter> twice |
Enter the quantity ordered. If you leave this field blank, a quantity of 1 is assumed.
Negative Quantity
| • | This is used to specify returned goods on an invoice. |
| • | For a credit memo, always enter a positive number as a credit for a particular item. (A negative number is not allowed.) |
|
Format |
99,999,999.99999- |
|
Example |
Type 5 |
Enter the unit price. The quantity is automatically multiplied by this price and the extended price appears.
You may enter a price of zero, but will be required to confirm that you really wish to do this.
Options
You may use the option:
|
<F2> |
For the item’s price from the Goods/Services file, if there is one. |
|
Format |
9,999,999,999.99999 |
|
Example |
Press <F2> |
This field, is entered identically whether interfaced to I/C or not.
Customer Credit Check
As soon as the discounted amount of the line item is known, the customer credit is checked.
Options
Enter the unit cost or use the option:
|
<F2> |
For the unit cost from Goods and services |
Although not seen by the customer, the unit cost is important because it is used to calculate the profit margin on this line item. This is required if you pay commissions based on margin. It is also transferred into the A/R Miscellaneous Charges file and is included in the cost of the sale on the Sales Journal.
|
Format |
999,999,999.99999 |
|
Example |
Press <F2> |
If you unchecked (no) to Taxable by line item in Control information, this field cannot be entered.
If the tax code in the header screen has zeros for all tax percents, this field displays as Not applicable and may not be entered.
Otherwise, the format of this varies depending on your answer to Taxable by tax rate in Control information:
| • | If you unchecked this field (no), a single check box controls whether or not this line item is subject to all the tax rates in this invoice’s tax code. Specify whether or not the item is taxable: |
|
Format |
Check box , checked is yes and unchecked is no |
|
Example |
(Appears automatically) |
| • | If you checked the box, there are one to five flags separated by slashes — one for each of the tax rates in that tax code. A window appears as shown. |
The cursor moves in succession through each tax rate in this tax code. Specify for each tax rate whether or not this item is taxable under that rate.
|
Format |
Check box, checked is yes and unchecked is no |
|
Example |
(Appears automatically) |
This field is skipped if Control information specifies that you do not use commissions.
Otherwise, accept the default of checked if a sales representative is entitled to a commission on this sale, or uncheck it if not.
|
Format |
Check box, checked is yes and unchecked is no. The default is checked. |
|
Example |
Select <Enter> to accept the default |
These fields may only be entered if interfaced to J/C and if <F2> was selected for the Job # header field to indicate multiple jobs. These fields are entered identically whether or not I/C is interfaced. See the I/C interfaced Job #, Sub job # and Cat-sub-chg or Cat-sub fields descriptions.
This field appears on the screen only if Control information specifies that sales are distributed manually. If not, the sale amount is automatically distributed to the default account.
If present, this field appears as sales account if this is an invoice, or as credit account if this is a credit memo.
Returned merchandise should be credited to the same account it was originally sold from, whether on an invoice or a credit memo.
What constitutes the default depends on your answer to the question Multiple cost centers ? in Control information and on whether or not this line item is for a job. There are three cases:
| • | You are not using multiple cost centers and this line item is not for a job. The first sales account from Control information is displayed. The cursor does not move to this field on initial entry, but you can change the account from Field number to change ?. The default cost center from Control information does not display, but when prefixed to the main and sub-account on display the result must be a valid G/L account number. |
Options
You may use one of the options:
|
<F1> |
For the next sales account from Control information |
|
<SF1> |
For the previous sales account |
These options are not available if no sales accounts are defined in Control information.
| • | You are using multiple cost centers and this line item is not for a job.The cursor moves to this field on initial entry. No default displays. You must enter all segments of the account number, including the cost center if any, and this must constitute a valid G/L account. |
Options
You may use one of the options:
|
<F1> |
For the next sales account from Control information, prefixed by the cost center from the invoice header |
|
<SF1> |
For the previous sales account |
These options are not available if no sales accounts are defined in
Control information.
| • | This line item is for a job. The default is this job’s billing account from J/C Job descriptions (Jobs). This contains all segments of the account number; the header cost center and the default cost center from Control information are not used. The cursor does not move to this field on initial entry. The default is selected automatically, but you can change it from Field number to change ?. |
Options
You may use the option:
|
<F2> |
For the job’s default billing account |
|
Format |
Either full account number format or main/sub format, as described above. |
|
Example |
(Does not occur in this example) |
Options
Change any field as desired, then press <Enter> to process another line item. For an existing line item, you may also use the option
|
<F3> |
To delete this line item |
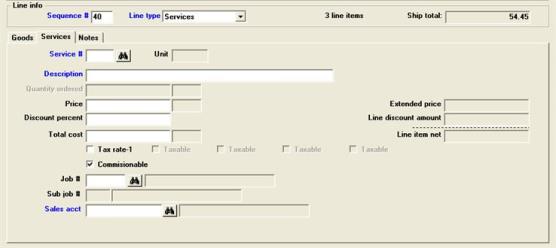
Graphical Mode
The sequence number fills in automatically. To go to the sequence number field and change it manually you may select the <Shift+Tab> keys or click on the field with your mouse.
After selecting Services in the Line type field, the Services tab displays and looks appears similar to this:
Character Mode
After pressing <F2> for the Sequence # and typing S for the Line type, the screen appears thus:
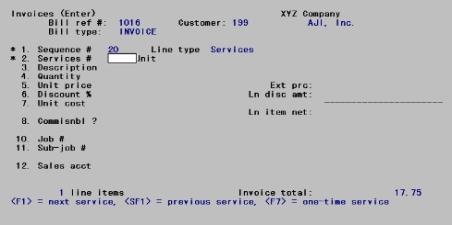
Enter the following information:
Options
Enter the service number or use one of the options:
|
<F1> |
For the next service in Goods and services |
|
<SF1> |
For the previous service |
|
<F7> |
For a one-time service (one that is not in Goods and services) |
A one-time service has a blank service number and is identified only by its description. It is used only on this invoice and is not added to Goods and services.
You can enter a service number that is not already in Goods and services, in which case you are so informed and asked whether you want to enter it anyway.
| • | If this is merely a keying error, select No to re-enter the service number. |
| • | Select Yes to use this service number anyway. You are asked whether it should be added to Goods and Services. This gives you a chance to enter new services as you go. |
Select No to use the service on this invoice only.
Select Yes to add the service to Goods and services. This has the same effect as entering it using the Goods and services (Enter) selection.
|
Format |
999 |
|
Example |
Press <F1> |
If this service is in the file, the unit will be displayed automatically and cannot be changed.
There are two types of services:
| 1. | has a unit of measure which allows a quantity can be entered |
| 2. | has a flat rate which means it does not have a unit of measure and a quantity cannot be entered |
Options
If this service is not in the file, enter the unit for this service, or use the option:
|
<F2> |
For HOUR |
This field cannot be entered for a service which either is not charged separately or is charged at a flat rate. When this is the case the field is grayed out in graphical mode and displays as None in character mode.
|
Format |
4 characters |
|
Example |
(The unit displays automatically in this example.) |
If this service is on file, its description displays automatically. You can change this or press <Enter> to accept it as is.
If the service is not on file, enter the description of the service.
|
Format |
The service text length specified in Control information |
|
Example |
Press <Enter> |
Using graphical mode a field displays where you may enter up to 10 lines of description. If more than 1 line of description has been entered the word (more) displays. When the word is black this indicates that more than 1 line of description has been entered and you may click on (more) to view additional lines of description, even when you are not in edit mode. When the word is grayed out this means there is only 1 line of description for the service.
In character mode, the following message displays:
Do you wish to enter any additional description ?
Answer Y to enter up to nine additional lines of description.
|
Format |
One letter, either Y or N. The default is N. |
|
Example |
Press <Enter> |
If you had answered Y, a window would have opened to allow the additional description. This description is not added to the file but appears on this document only. If there is more information than can be viewed on the first description line, then the word (more) displays to the right of the description line.
Options
If you have fewer than nine lines, use the option:
|
<F2> |
To terminate the description. Press this at the next line after the one you want to save. |
The window closes as soon as the additional description is entered, and only the first line remains visible.
|
Format |
Up to nine lines, each of the service text length specified in Control information |
|
Example |
(Does not occur in this example) |
If there is no unit for this service, this field cannot be entered.
Otherwise, enter the number of units. If you leave this field blank, a quantity of 1 is assumed.
For an invoice (but not a credit memo), you may enter a negative quantity. This means you are giving a credit for this line item.
|
Format |
99,999,999.99999 |
|
Example |
Type 5 |
If there is a unit for this service, enter the price per unit. If there is no unit, enter the total price of the service.
Options
If the service is on file, you may use the option:
|
<F2> |
For the price on file for this service in the Goods and |
If this is a unit price, the quantity is automatically multiplied by this price and the extended price displays.
If this is a total price, the price as entered is rounded to the nearest penny for computing the extension.
|
Format |
9,999,999,999.99999 |
|
Example |
Press <F2> |
This field is the same for services as for goods.
Customer Credit Check
As soon as the discounted amount of the line item is known, the customer credit is checked.
Options
Enter the cost per unit for this service, if a unit has been specified; otherwise the total cost. You may use the option:
|
<F2> |
For the cost on file in Goods and services |
Although not seen by the customer, the unit cost is important because it is used to calculate the profit margin on this line item. This is required if you pay commissions based on margin. During invoice posting it is also passed through A/R Miscellaneous Charges and is included in the cost of the sale on the Sales Journal.
|
Format |
999,999,999.99999 |
|
|
999,999,999.99 (For total cost) |
|
Example |
Press <F2> |
Taxability for services is entered in the same way as for goods.
This field is skipped if Control information specifies that you do not use commissions.
Otherwise, check this box (yes) if a sales representative is entitled to commission on this line item, or leave it unchecked if not.
|
Format |
Check box. Checked is yes and unchecked is no. The default is no |
|
Example |
Select the <Enter> key for the default |
Job and sub-job numbers are entered the same way for services as they are for goods. See the item Job # and Sub job # fields.
Credit acct
This field appears on the screen only if Control information specifies that sales are distributed. If not, the sale amount is automatically distributed to the default account.
Enter the sales account to which the revenue from this service is to be distributed.
If This Service Is Not For a Job
One of the default sales account (main and sub-account only) from Control information is combined with the cost center or sub account from the invoice header.
Options
You may use the option:
|
<F1> |
For the next sales account specified in Control information |
|
<SF1> |
For the previous sales account |
These options are not available if no default sales accounts are defined in Control information.
If This Service Is For a Job
The billing account for the job is used. As this includes any cost center or sub account, the cost center or sub account from the invoice header is not used.
|
Format |
Your standard account number format, as defined in Company information |
|
Example |
Press <F1> |
Options
Change any field as desired, then press <Enter> to process another line item. For an existing line item, you may also use the option:
|
<F3> |
To delete this line item |
Graphical Mode
After selecting a Line type of Notes, the following tab displays:
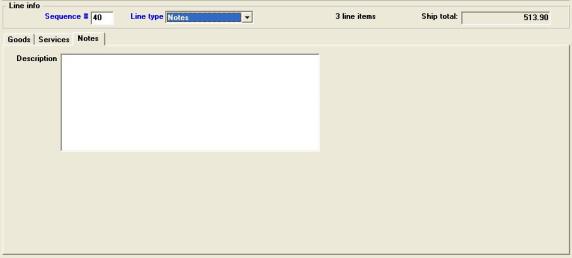
Enter whatever notes or comments you want to appear on the invoice at this point. You can press <Enter> at the beginning of any line to leave a blank line. You may copy and paste information to and from this field.
|
Format |
10 lines with word wrap, each up to the maximum service text length specified in the Service text length field in Control information. A maximum length of 50 is displayed above. When less than fifty the field becomes narrower. |
|
Example |
Type Please contact our sales office if have any questions. |
Character Mode
After pressing <F2> for the Sequence # and typing N for the Line type, the screen appears thus:
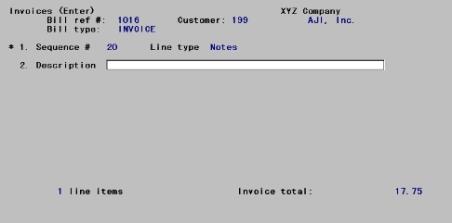
Enter the following information:
Description
Enter whatever notes or comments you want to appear on the invoice at this point. You can press <Enter> at the beginning of any line to leave a blank line. To exit from entering the note, press <F2>.
|
Format |
10 lines, each up to the maximum service text length specified in Control information |
|
Example |
Type Please contact our sales office if have any questions. |
Options
Change any field as desired, then press <Enter> to process another line item. For an existing line item, you may also use the option:
|
<F3> |
To delete this line item |
|
Note |
When printing invoices with Notes line items, be sure to use an invoice format that allows Notes. Refer to the Invoice Formats chapter. |
Standard bills may consist of many lines. See the Standard Bills chapter. When transferred to an invoice, these are renumbered in increments of ten.
To avoid conflict with the sequence numbers of existing line items, a standard bill may only be added to the end of an invoice. You will only be able to enter a Standard bill Line Type (B type in character mode) if the Sequence # is exactly 10 higher than the number of the last existing line item.
Once transferred, a standard bill is not required to remain at the end. You can continue adding more line items (including more standard bills).
After being transferred, a standard bill is no longer treated as a unit. You can change or delete individual line items after their transfer.
After selecting a Standard bill Line type, the following screen displays:
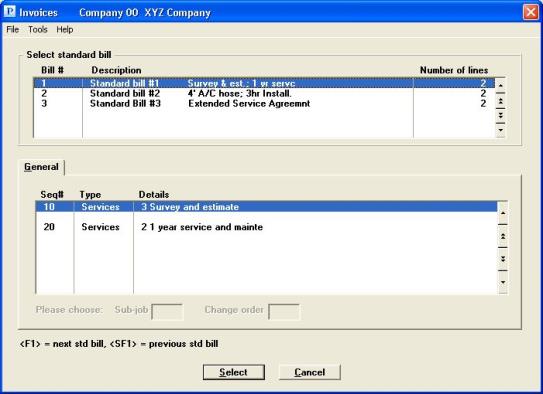
The two list boxes consist of the header on top and the lines on the bottom. Up to six standard bills will display in the header list box. To locate other standard bills you have the following options:
|
Down arrow or <F1> |
For the next standard bill on file |
|
Up arrow or <SF1> |
For the previous standard bill |
|
Page Down |
For the next group of six standard bills |
|
Page Up |
For the previous group of six standard bills |
|
End |
For the last standard bill |
|
Home |
For the first standard bill |
Once you have found the standard bill to insert into the invoice, highlight the line and click the Select button. If you do not want to insert a standard bills, click on the cancel button.
Please Choose: Sub-job
This field appears only if this invoice is for a job and the job uses but does not bill for sub-jobs.
Enter a sub-job number to be used in assigning a cost item to each Goods line item in the standard bill that contains a category number.
|
Format |
999 |
|
Example |
(Does not occur in this example) |
Please Choose: Change Order
This field appears only if this invoice is for a job, and that job has one or more change orders.
Enter a change order number to be used in assigning a cost item to each Goods line item in the standard bill that contains a category number.
|
Format |
999 |
|
Example |
(Does not occur in this example) |
Transferring The Standard Bill
There will be a period of processing as the selected bill is transferred.
If there is insufficient quantity on hand for a Goods item at the warehouse specified in the standard bill, the quantity used will either be the quantity in stock or the full quantity entered, whichever has been specified in the standard bill. No attempt is made to automatically find alternate items or warehouses. You may do this manually after the transfer is complete.
Options
You are informed when the standard bill has been transferred. At this point, your options are:
|
<F1> |
For the first of the line items which have just been copied. This lets you review the standard bill and make changes as needed. |
|
<F2> |
For a new line item, to be added at the end of the line items which have just been copied |
Customer Credit Check
A customer credit check is performed.
Account Numbers and Cost Item Numbers
Each Goods or Services line item of a standard bill, when transferred to an invoice or credit memo, requires an account number.
When I/C and J/C are interfaced, Goods line items which contain a category number also require a cost item number.
These are assigned automatically, based on the defaults for this invoice.
This process can create nonexistent account numbers or cost item numbers. Any such errors can be fixed manually after the transfer. The invoice can be posted even if these are not fixed, but the resulting G/L and J/C transactions will have to be fixed before they can be posted within those modules.
Character Mode
After pressing <F2> for the Sequence # and typing B for the Line type, the screen appears thus:
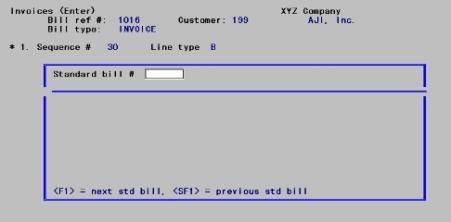
Enter the following information:
Standard Bill #
Options
Enter the number of the standard bill that you want to paste into this invoice. This must already have been defined in the Standard bills selection. You may also use one of the options:
|
<F1> |
For the next standard bill on file |
|
<SF1> |
For the previous standard bill on file |
|
Format |
6 characters |
|
Example |
Press <F1> |
Right Standard Bill ?
If you entered a number, the standard bill on file with that number will be displayed, along with a count of the number of line items in this bill.
Options
Answer Y to select this bill or N to enter a different one, or use one of the options:
|
<F1> |
For the next standard bill on file |
|
<SF1> |
For the previous standard bill |
|
<F2> |
To examine this standard bill in detail before selecting it |
|
Format |
One letter, either Y or N. There is no default. |
|
Example |
Press <F2> |
The following screen appears:
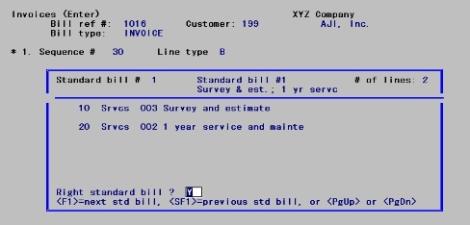
This displays all the line items in the standard bill, three at a time.
Enter the following information:
Right Standard Bill ?
Options
Answer Y to select this bill or N to enter a different one, or use one of the options:
|
<F1> |
For the next standard bill on file |
|
<SF1> |
For the previous standard bill |
|
<PgDn> |
To view the next three line items |
|
<PgUp> |
To view the preceding three line items |
|
Format |
One letter, either Y or N. The default is Y. |
|
Example |
Press <Enter> |
Use This Standard Bill ?
Answer N to select a different standard bill, or Y to select this one.
|
Format |
One letter, either Y or N. There is no default. |
|
Example |
Type Y |
The following screen displays upon selecting the Exit button from the line-item screen.
Graphical Mode
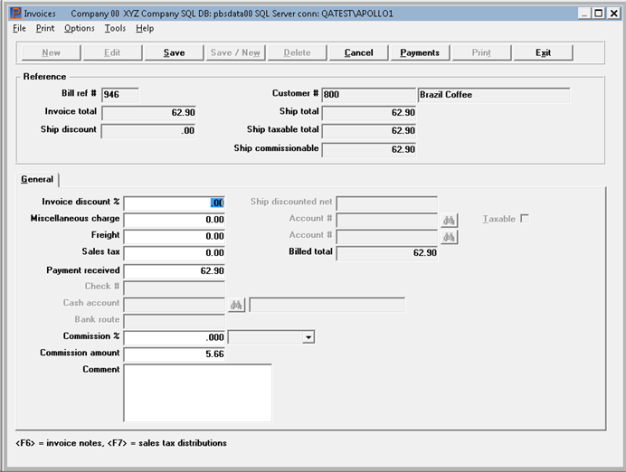
These buttons are similar to the buttons on the first screen. Here is specific information on a couple buttons:
If you are using immediate printing and you selected an invoice printer workstation, this button is available to print the invoice. Otherwise this button is grayed out. See Immediate Printing.
Payments
When using PBS Multi-payment processing, the Payment button opens the payment window. When not using PBS Multi-payment processing this button is grayed out. For more information on using multi-payments see the PBS Multi-payment Setup appendix and the PBS Multi-payment Processing section below.
Character Mode
After pressing <Esc> from Field #1 on the line-item screen a screen like the following will display:
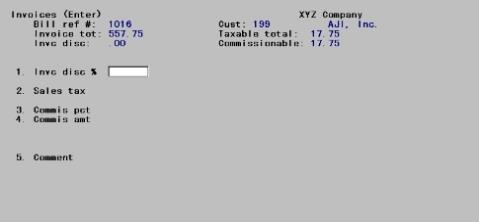
The screen heading displays relevant totals that you cannot change directly:
Ship total is the total dollar amount of all line items, less line item discounts (if any).
Ship discount displays only if Control information specifies that you use overall invoice discounts. After you enter the Invoice discount % field the total dollar amount of the discount will display.
Ship taxable total field shows the sum of the line items which were specified as taxable. After you enter a discount % in the first field, the taxable total will be reduced by the amount of the discount.
Ship commissionable field displays only if Control information specifies that commissions are used. It is the total dollar amount that is subject to a commission.
Many of the field shown are optional. Depending on your choices in Control information and elsewhere, they may not appear on your screen, or may appear with a different number. All these will be identified as they occur.
Enter the information as follows:
This field cannot be entered if Control information specifies that you do not use overall invoice discounts.
Options
Otherwise, enter the invoice discount percent or use the option:
|
<F2> |
For the customer’s default. This option is available only if there is a non-zero value for this in Customers. |
Upon entry, the discount amount is calculated and displayed at the top of the screen, as is the discounted net amount (invoice total less discount.
The invoice discount percent is not applied to the miscellaneous or freight charge, nor to the sales tax regardless of what you may have answered to the Discounts calculated on Miscellaneous charges, Freight and Sales tax check boxes in Control information. Those questions relate to any customer discount which the customer may be entitled to upon payment, provided that he pays on time.
|
Format |
99.999 |
|
Example |
Type 5 |
This field does not appear on the screen if the Use misc charges check box from Control information specifies that you do not use miscellaneous charges.
Otherwise, enter any miscellaneous charges for this invoice.
If this is a credit memo and miscellaneous charges are being credited, do not enter a minus sign. Enter the miscellaneous charges as a positive amount.
|
Format |
99,999,999.99- |
|
Example |
Type 20 |
Options
If miscellaneous charges have been entered and you checked the Distribute miscellaneous charges box in Control information, enter the account number or use the option:
|
<F2> |
For the miscellaneous charges account from Control information |
If the miscellaneous charges are taxable, check the box; if they are not, uncheck it.
You cannot specify the taxability of individual tax rates separately, as you can for line items. If the miscellaneous charge is taxable under one tax rate of this tax code, but not under another, you will have to adjust the total sales tax. If this is a problem, consider entering the miscellaneous charge as a separate line item instead of putting it in the totals screen.
|
Format |
Check box, checked is yes and unchecked is no. The default is whatever your response has been to the question Sales tax calculated on Miscellaneous changes in Control information. |
|
Example |
Check box |
This field is skipped if the Use freight charges field from Control information specifies that you do not use freight charges.
Enter the amount of any freight charges. On credit memos, enter freight charges without any minus sign.
|
Format |
9,999,999.99- |
|
Example |
Type 60 |
Options
If there are freight charges and you have checked the box Distribute freight from Control information, enter the account number or use the option:
|
<F2> |
For the default freight account from Control information |
You are not asked whether freight charges are taxable. They are either taxed or not, depending upon your response to the Sales tax calculated on Freight field in Control information. You may also consider entering the freight charge as a separate line item instead of putting it in the totals screen.
|
Format |
Your standard account number format, as defined in Company information |
|
Example |
Press <F2> |
The sales tax, if any, may be calculated by applying the sales tax percent of applicable tax rates to the Taxable total displayed at the top of the screen.
Sales tax may also be calculated by invoice line unit price or extended price. Calculating the sales tax by line is determined by the setup of Tax codes. For an example of this type of taxation see the Sample Tax Calculations section from the Tax Codes chapter.
Miscellaneous charges and freight are added to the taxable total if specified to be taxable in Control information. The sales tax percent comes from the tax code that was entered on the header screen for this invoice.
After entry of the sales tax, the following amounts are added:
| • | Invoice total (or Discounted net, if an invoice discount is used) |
| • | Miscellaneous charges (if used) |
| • | Freight (if used) |
| • | Sales tax (if any) |
The total is displayed as Billed total.
Options
Enter a sales tax, or use the option:
|
<F2> |
For the calculated amount |
If you enter a non-zero sales tax when the tax code specified for this invoice has a zero tax rate, you will be warned but the entry will be accepted.
|
Format |
99,999,999.99- The default is the calculated amount. |
|
Example |
Press <F2> |
If the sales tax entered is different from the calculated amount, and the applicable tax code distributes the tax to more than one account, the following screen displays:
Graphical Mode
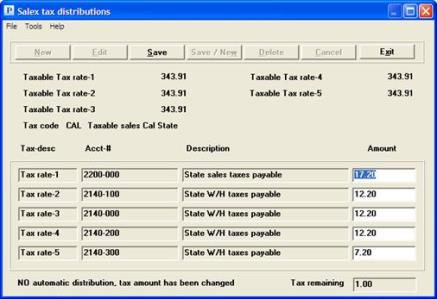
Read below about the tax Amount field.
Character Mode
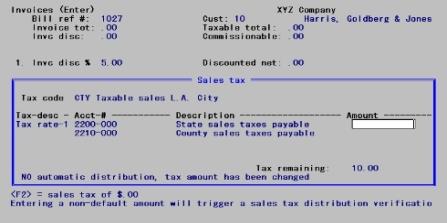
Any time you use this window, you will create an entry on the Sales Tax Exception Report. See the Sales Tax Exception Report section of the Sales Tax Reports chapter. Also see a sample Sales Tax Exception Report in the Sample Reports appendix.
This screen identifies the tax code and shows a separate line for each tax rate within it (up to five of them), with the description, account number, and taxable amount for each tax rate. You cannot change the tax code from this screen; if this becomes necessary, complete the invoice then change the tax code on its header screen.
The amount you have entered for the sales tax must be completely distributed among the tax rates shown. The cursor moves in succession through the amount fields of each tax rate. The tax remaining to distribute displays continuously.
Enter the following information:
Enter the amount of the tax to be distributed to each tax rate.
Options
You may use the option:
|
<F2> |
To pro-rate the sales tax entered in the same proportion as the original calculation for this invoice. The cursor will move to Any change ?. |
If all the tax rates have the same tax brackets, then at the first tax rate you may use the option:
Options
At the last tax rate you may use the option:
|
<F2> |
To apply to this tax rate the entire amount remaining to distribute. |
|
Format |
99,999,999.99- |
|
Example |
(Does not occur in this example) |
When completed with the tax entry select the Save button to save the changes or Select the Exit button to discard the changes.
If you are using PBS Multi-payment, as determine by the A/R Control information field Invoice pmt type, go to the PBS Multi-payment Processing section below.
This field cannot be entered for credit memos, and for invoices it can be entered only if you have set the Invoice pmt type in A/R Control information to Cash only.
Your answer to Use cash as memo only in Control information determines whether an amount entered here automatically generates an open item payment when posting the invoice, or whether the entered payment is treated as informational only.
If Use cash as menu only is not checked, the payment amount entered here is posted to A/R open items as a P payment type. If informational you must enter a payment using Cash receipts (Enter) and apply the payment to the posted invoice. You may also apply a payment to an invoice when the cash receipt is entered and posted before the invoice is posted.
Enter the amount of any payment already received for this invoice. This may be more or less than the amount billed.
|
Format |
999,999,999,999.99 (If not for a job) 999,999,999.99 (If for a job) |
|
Example |
Type 250 |
If you checked the Control information field Process prepaid cash field, and you have entered and posted at least one prepaid cash (N type) amount to open items for the customer this question displays.
If you select No the cursor goes back to the Payment received field. If you select Yes the Prepaid Document window displays which is similar to the following:
Graphical Mode
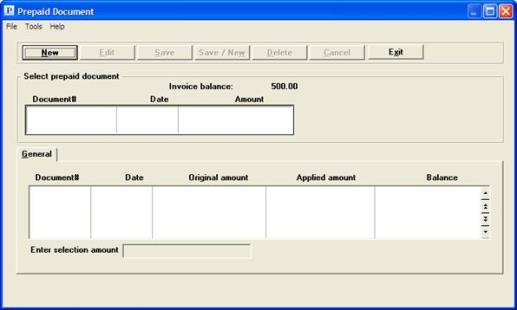
Select the New button to enter a prepayment. Prepayment amounts display in the lower list box. Use the arrow keys, Page Up, Page Down, Home and End keys to find the prepayment you want to apply to the invoice.
You may apply up to three prepaid cash amounts to the invoice.
Once you find the prepayment, select the Save button to use the full prepayment amount or you may enter an amount less than the prepayment. You may also select the Save/New button to apply another prepayment.
When finished select the Exit button.
Character Mode

Enter an amount or accept the default amount. The default is the prepaid cash amount remaining for the first prepaid amount on file.
You may apply up to three prepaid cash amounts per invoice.
This field cannot be entered for credit memos, and for invoices it can only be entered if you have the Invoice pmt type field in Control information set to Cash only.
If the payment received is zero, this field is skipped and is left blank.
Otherwise, enter the check number of the payment received. If currency was received, leave this field blank; this will display as CASH.
|
Format |
999999 |
|
Example |
Type 99100 |
This field is skipped for entry if you entered a prepaid cash amount for field 5.
This field cannot be entered for credit memos, and for invoices it can only be entered if you have the Invoice pmt type field in Control information set to Cash only.
If the payment received is zero, this field is skipped and is left blank.
Options
Otherwise, enter the cash account to which this payment is to be deposited. This must be an existing entry in the Cash accounts selection of the System Manager (CTL) module. You may use one of the options:
|
<F1> |
For the next entry in Cash accounts. If there is only one entry on file, the <F1> and <SF1> options are not available. |
|
<SF1> |
For the previous cash account |
|
<F2> |
For the default cash account from Control information |
|
Format |
Your standard account number format, as defined in Company information |
|
Example |
Press <F2> |
This field cannot be entered for credit memos, and for invoices it can only be entered if you have the Invoice pmt type field in Control information set to Cash only.
If the payment received is zero, or if you received payment in cash, this field is skipped and is left blank.
Otherwise, enter the routing number that is on the check. This is usually in the upper right-hand portion of the check and looks something like 99-999/999. This field is informational only and may be left blank.
|
Format |
15 characters |
|
Example |
Press <Enter> to leave this blank. |
This field cannot be entered if in Control information that you have not checked the Use sales reps field or have not checked the Use commissions field.
Otherwise, three cases are possible:
| • | If none of the line items in the invoice have been flagged as commissionable, this field is omitted (you can still enter a flat commission amount in the next field). |
| • | If I/C is interfaced and the accumulated commission of all line items is non-zero, the percent field displays as zero and the accumulated commission displays in the commission amount field. The cursor does not pause at either the commission percent or the amount, but either can be changed from Field number to change ?. If you change the commission percent field: |
Enter a non-zero percent to calculate commission without regard to commission code.
Change the percent back to zero to restore the accumulated commission amount of the line items.
| • | If I/C is not interfaced and at least one Goods or Services item is commissionable, the cursor stops at this field. |
Press <Enter> to enter the commission as a flat amount. The percent field will display as zero and the cursor will move to the commission amount field.
Enter a non-zero percent to calculate the commission from the percentage.
Options
If you have entered a non-zero percent (whether or not I/C is interfaced), you may use the option:
|
<F2> |
For the default commission percent and method (on price or on margin) for this customer or for this sales representative (whichever method has been specified in Control information) |
|
Format |
99.999 |
|
Example |
Press <F2> |
(On)
If you enter a nonzero commission percent, and if you have specified in Control information that commissions may be paid on margin, you are asked whether this commission is on price or margin. Select on Price for price or on Margin for margin.
|
Format |
Drop down list, either on Price or on Margin. The default is whatever commission method is on file for this customer or this sales representative (whichever source has been specified in Control information) |
|
Example |
(Does not occur in this example) |
(The explanation with the Commission % field explains when this field can be entered.)
Whenever the commission is entered as a flat amount, the commission percent is set to zero.
If you are interfaced to the PBS I/C and the commission is on margin, the exact amount cannot be calculated until the invoice is posted (because the cost is only known approximately, as described for the Cost field). This field therefore displays as Calculated at posting and cannot be changed.
|
Format |
99,999,999.99- |
|
Example |
(Displays automatically in this example) |
Comments are optional. Unlike Notes line-items, which they otherwise resemble, comments print in the totals area of your invoice instead of the body of the invoice.
Options
Enter any desired text. At any line except the last, you may use the option:
|
<F2> |
To terminate the comment. Every line entered, up to but not including the current one, is included in the comment; and the cursor moves at once to the Save button. |
If you have defined a comments field on your invoice format, when you print invoices you can specify a generic comment to print on all invoices of that run that do not have an individual comment. In the example below, Thank you for your order will print on this invoice even though you may specify Happy New Year as the default for the entire print run.
|
Format |
5 lines, each up to the number of characters specified in Comment text length in Control information |
|
Example |
Type Thank you for your order Press <Enter> Press <F2> |
Options
Make any needed changes, then press <Enter> to complete the invoice. You may also use the options:
|
<F6> |
Invoice notes. See Using Invoice Notes |
|
<F7> |
To view or change the sales tax distribution. See Sales Tax Screen |
Customer Credit Check
Miscellaneous charges, freight, or sales tax may tip the customer over his credit limit, so a credit check is performed at this point just as it is for a line item. The only difference is that canceling this line is not an option.
You must have an RW.LIC PBS license file that includes the credit card software subscription in order to use the PBS Multi-payment features. See the PBS Multi-payment Setup appendix for more information and configuration instructions.
PBS Multi-payment allows you to select payment types of cash, check and credit card(s). Also, part or all of the invoice amount may be applied to the customer's A/R terms. You may use one or more payment types for each invoice. For example, part of the invoice may be paid via check and the remainder can by applied to A/R terms. Another example, you may pay an invoice with two different credit cards. PBS Multi-payment is used with both invoices and credit memos.
All payment types for invoices and credit memos are not posted to open items until after the transaction is printed and posted.
When using a credit card as a payment method the system interfaces to a credit card processor. A separate window displays for applying or entering a new credit card token. The invoice must be printed and posted before the payment goes to open items and is available for processing Deposits.
|
Note |
In order to finish the entry of an invoice, you must enter at least one payment type or select the customers terms. If you are not finished with entering the invoice, you may edit it later and add, delete or change any terms, cash or check payment. Credit card payments cannot be changed or deleted. You may add additional credit card payments. |
Once you get to the Payments received field or click on the Payments button the following window displays:
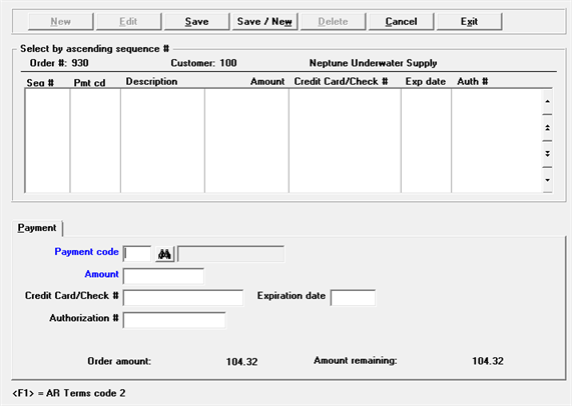
There are two display-only fields.
Amount:
This is the amount that must be fully paid.
Amount remaining:
This is the amount that has not been paid. This number will reduce when payments are entered. It must be zero before you exist the screen.
When the screen first displays on a new entry, the focus goes immediately to the Payment code field. If you are reviewing previous payments, then the focus goes to the list box.
Enter these fields:
Enter the payment code. The choices are determined by what has been entered in Payment codes found under the CTL Setup menu. For entering or changeing payment codes see the Payment Codes chapter in the System user documentation.
Payment codes usually include a credit card type, check type and cash type. After entering a credit card type payment code the token lookup displays, See Credit Card Token Selection Lookup.
You may also use the option:
|
<F1> |
To apply the whole or remaining amount to the customer's A/R terms |
Enter the amount or use the <Enter> key for the remaining balance.
After entering the amount, what happens next depends on the payment type used:
| • | If you selected A/R terms or entered a cash code then you are finished and you may save the entry. |
| • | If the payment code is a check type , then you must enter the check number. |
| • | If the payment code is a credit card type, the Approval window displays and X-charge is called to process the payment. At this point you are done with the credit card payment. If there is an error with the credit card an error message will display indicating the problem. |
If there is an amount remaining you must enter another pay code for the remainder.
This field can only be entered if you are paying by check.
If you are paying by credit card, the credit card token entry/selection window opens first. After you enter or select a credit card token and the payment is processed this field is filled in automatically.
Expiration date
When paying by credit card, the credit card token entry/selection window opens first. After you enter or select a credit card token and the payment is processed this field is filled in automatically.
This field can only be entered if you are paying by check and you are required to enter an authorization number based on the payment code setup.
If paying by credit card, the credit card token entry/selection window opens first. After a credit card token is selected and the payment is processed this field is filled in automatically.
Exiting
After you have finished entering the payments you may save the invoice or credit memo. When you exit the payments window, the Payment received field becomes a total of the cash, check and credit card payments made.
If the payment amounts do not match the total invoice amount then a message indicates that "Balance amount remains - cannot exit!". You must enter another payment or put the remaining amount to terms. You may also remove the payments entered to exit.
Credit Card Token Selection Lookup
A token is a substitute for sensitive credit card data. Sending the token to a tokenization system retrieves the credit card data in a manner that is secure. The customer's credit card data never reaches the computer where the transaction takes place. Thus, PBS does not store credit card information.
This screen is where you initiate the process of entering a new token a select an existing credit card token for paying the customer's invoice:
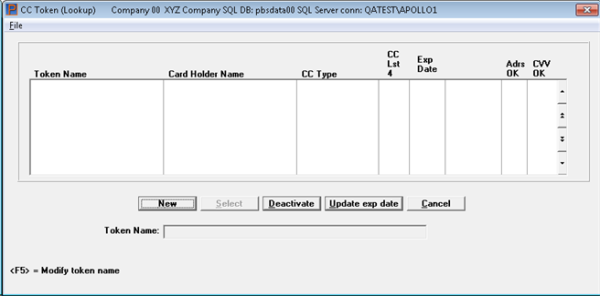
If a token exists and it is the one you want to use, click on the Select button or Alt+s.
Select this button or hit Alt+n to display the token entry window where you enter the information for a new credit card. See the Credit Card Token Entry Window.
If the card is no longer being used for purchases, select this button.
If the expiration date requires updating select this button.
To return to the payment window and enter a different payment type.
Credit Card Token Entry Window
Enter the credit card and other information. The system will create a new token record locally with the associated credit card information stored on the credit card service provider system. This information can be used for later credit card payments for the same customer. When you select the New button the following screen displays:
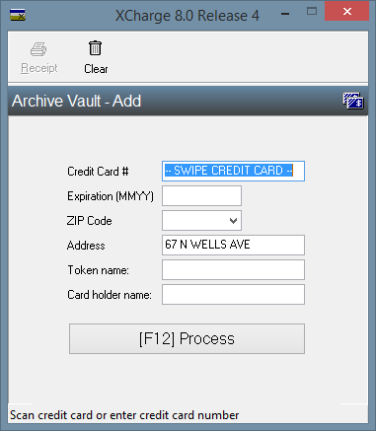
After entering the information and selecting (F12) Process, verification screen displays. Select Yes if the credit card information is okay.
After that you are taken to the Amount field.
If you have a credit card payment, you have these choices for handling a payment if there is a change in the invoice total:
| • | If the amount remaining is a positive number, enter a new credit card payment. |
| • | The amount remaining can be a negative or positive number. It can become negative if you change the invoice by entering an item with a negative quantity. This usually reduces the amount owed. It can become negative if you reduce the quantity being purchased. Miscellaneous charges and freight can also be changed. |
If the amount remaining is a negative or positive number, you may delete the original credit card payment. Deleting a credit card payment either voids or refunds the payment with X-charge. Then you may enter a new credit card payment, use any of the other payment options or put the remainder on A/R terms.
Once the payment is completed you are returned back to the payment entry window for reviewing the payment and if needed, entering additional payments.
If you specified in Control information that an immediate invoice is allowed and you have specified an invoicing station at the beginning of this session, see Please enter invoicing station, you will be presented with several options, depending on the Invoice printer control station setup.
If the printer control station has been assigned Windows printer the Windows Print selector will display first. In the Print selector you select a printer or use the default printer. Next the "Immediate invoicing printing" window displays (see screen below).
If a Company information printer has been assigned in the printer control station the "Immediate invoice printing" window displays first.
Graphical
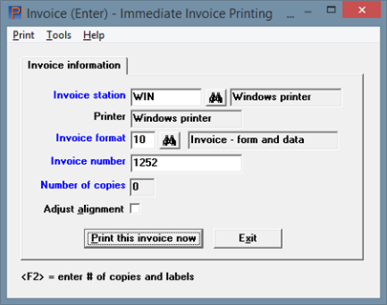
Character
This is the third screen with the "Immediate invoice printing" window:

Print This Invoice Now
Options
Select one of the following options. You can continue entering any of these options until either Yes or No is entered.
|
No |
Answer N if you do not want to print this invoice now. You will eventually have to print the invoice (using Invoices (Print)) before you can post it. The invoice header screen reappears for you to begin entering the next invoice. |
|
Yes |
To print this invoice now, using whatever options are in effect for invoice format, invoice number, and invoicing station. These are shown in the window. |
Is The Invoice Just Printed Ok ?
Select Yes if the invoice is correct. The invoice header screen reappears for you to begin entering the next invoice. Select No to allow entering further options in this window.
|
Character Selection |
Graphical field name |
Description |
|
F |
To change the invoice format. Enter a valid invoice format number, or use the standard <F1>, <SF1>, and <F8> options for next, previous, and look-up. |
|
|
I |
To change the number assigned to this invoice. |
|
|
S |
To change to a different invoicing station. Enter a valid invoice station code, or use the standard <F1>, <SF1> and <F8> options for next, previous, and look-up. |
|
|
A |
To print a test alignment form filled out with lines of X’s and 9’s. If you are using an invoicing station set up to use a PDF printer, the alignment will display in an Adobe application on screen. |
|
|
C |
Number of copies |
In addition, for laser printers and Windows printers only, this option lets you adjust the alignment. A window appears for the purpose.
Enter the following information.
Up/Down Adjustment
Enter a vertical adjustment in inches. For a Company information laser printer you may enter positive or negative numbers. If this is an adjustment for Windows printer only enter a positive number.
|
Format |
.99- |
Left/Right Adjustment
Enter a horizontal adjustment in inches. For a Company information laser printer you may enter positive or negative numbers. If this is an adjustment for Windows printer only enter a positive number.
|
Format |
.99- |
Any Change ?
In this window, unlike most, the cursor is initially located in this field.
Answer Y to re-enter the window.
Answer N to accept the alignments as shown, to print a test alignment form, and to close the window.
|
Note |
When using a laser printer, you can save pre-printed invoice forms by printing the alignment on plain paper. Then place the printed alignment form on top of one of the pre-printed invoice forms and hold them up to a bright light to verify the alignment. |
Enter number of copies to print
|
<F1> or C |
To enter the number of invoice copies and the labels for each copy. This option only appears if your invoicing station is using a Company information laser or Windows printer. |
After selecting <F2> the Enter number of copies to print tab displays, which looks like this:
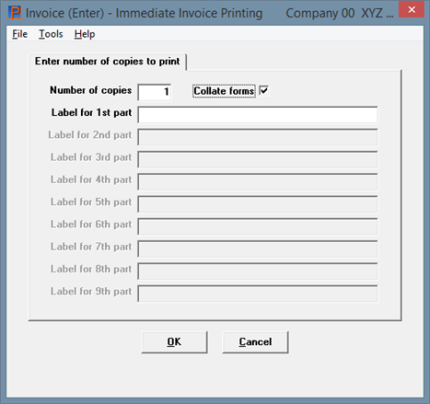
Enter the following fields:
Enter the number of copies. You may enter one through nine copies.
Check this box if you want to collate invoices with multiple pages and when printing multiple copies. When you select to print multiple copies to a Windows or Company information printer and there are more line items than will fit on one page, the program will collate the printed pages. Collate means: for each copy page two follows page one, page three follows page two and so on. When you do not check this field the program does not collate; it prints all the page one copies first, then it prints all page twos and so on.
Enter an identifying label to print for each copy.
|
Format |
25 characters |
Select a -PDF- or -PDFP- printer to generate PDF (Acrobat type) invoices files.
If you are using a -PDF- printer as set up in Company information, then the invoice will be saved as a PDF file. The Adobe™ Reader™ or Adobe Acrobat™ will display it as long as one of these applications are installed on your system.
Default configuration settings are provided for PDF files. See the PBS Administration documentation for information on the PDF configuration options and the setup of a Company information PDF printer.
In Windows and Thin client you can view and email these documents under the CTL menu selection Email/view printed PDF's found under PDF form file processing. The overview of configuration for emailing PDF files in PBS is found Email Configuration Appendix from the PBS Administration documentation.
PDF files are saved on the system in the PDFFIL\ARINVOICES directory. An example of the PDF invoice file name is xx_ARI_1_001100.PDF. The xx is the company number. The ARI indicates it is an Accounts Receivable Invoice. The "1" is the customer number and the 001100 is the invoice number. You may also print an invoice alignment as a PDF. The alignment file is named xx_ARI_ALIGNMENT_999999.PDF and is located in the PDFFIL\ALIGNMENTS directory. The alignment will display on screen if the proper application is installed.
Any Change ?
Answer Y to re-enter the window, or N to accept it.
You can enter an unlimited number of notes about this invoice by pressing <F6> or selecting Invoice notes from the Options menu. A windows similar to this displays:
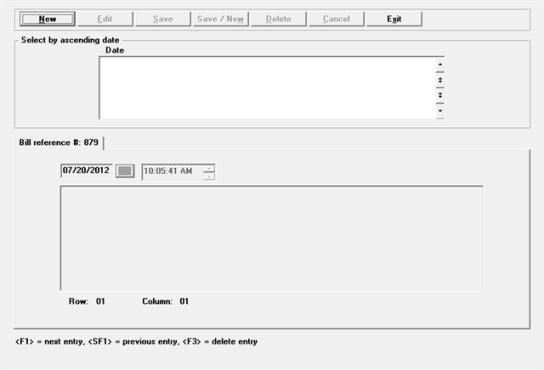
The date, time and first line for existing notes display in the list box at the top of the window.
Select Alt+n or click on the New button to enter a note. Each note may have up to 10 lines. When finished entering a note, select Alt+s or the Save button to save it.
Each note is date/time stamped so that you can browse through the notes in time sequence. These notes are never printed on invoices, so they are not seen by the customer.
|
Format |
10 lines of 77 characters each |
|
Example |
(Not used in this example) |
In character mode a special text editing function is used. This is described in the Using Notes section of the Use of Function Keys, Toolbar and Windows chapter in the System User documentation.
This selection provides you with a list of invoices which have been entered but not yet posted. The invoices may or may not have been printed.
View a sample Invoice List the Sample Reports appendix.
Select
Edit list from the Invoices menu.
The following screen appears:
Graphical Mode
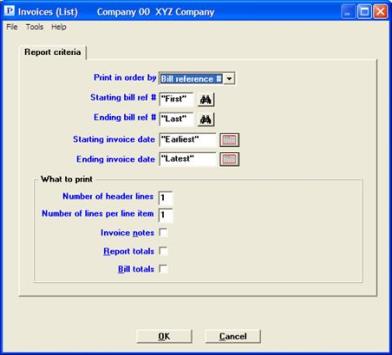
Character Mode
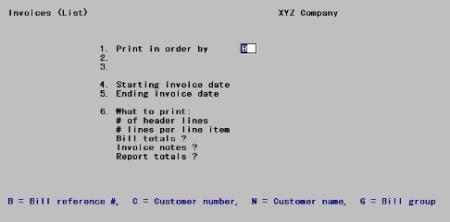
Enter the following information:
Select to print by Bill reference #, Customer number, Customer name, or by Bill group.
|
Format |
Drop down list. The default is Bill reference #. |
|
Example |
Press <Enter> for bill reference number. |
What you enter in the next two fields depends on the choice of order in which they are shown on the list.
Options
Enter the range of numbers or names to list, where choice represents whatever you entered in the Print in order by field. At each field you may use one of the options:
|
<F1> |
(customer name only) To toggle between entering a company’s name and a person’s name. |
|
<F2> |
For the "First" starting choice or "Last" ending choice |
|
Format |
6 characters for bill reference number 12 characters for customer number 25 characters for company name 14 characters for person’s surname 10 characters for person’s personal name 3 characters for group code |
|
Example |
Press <F2> at each field. |
Starting invoice date
Ending invoice date
Options
Enter the range of invoice dates to include, or use the option:
|
<F2> |
For the Earliest starting date or Latest ending date |
|
Format |
MMDDYY for each field |
|
Example |
Press <F2> in each field |
What to print
Select how much information to show for each invoice:
Options
Enter the number of lines to print for the header of each invoice, or use the option:
|
<F5> |
For "All" header lines |
|
Format |
One digit, either 1, 2, or 3. The default is 1. |
|
Example |
Press <F5> |
Options
Enter the number of lines to print for each line item of each invoice, or use the option:
|
<F5> |
For "All" information |
|
Format |
One digit, either 0, 1, 2, or 3. The default is 1. |
|
Example |
Press <F5> |
Check this box to print invoice notes printed for each invoice, or leave it unchecked to not do so. This refers to notes entered via <F6>, not to line items notes (which are printed as per your answer to # lines per line item).
|
Format |
Check box, checked is yes and unchecked is no. The default is unchecked |
|
Example |
Press <Enter> for the default of unchecked |
Leave the box checked to show the grand total information at the end of the report, or leave it unchecked to omit this.
|
Format |
Check box, checked is yes and unchecked is no. The default is checked |
|
Example |
Press <Enter> for the default of checked |
Leave the box checked to print totals information for each invoice, or uncheck it to not do so.
|
Format |
Check box, checked is yes and unchecked is no. The default is checked |
|
Example |
Press <Enter> for the default of checked |
Make any needed changes.
Select <Enter> or the OK button to print the Invoice List. Select <Esc> or the Cancel button to return to the menu.
Even if you specified (in Control information) that you normally print invoices immediately after entering them, you may still print them using this selection.
Invoice numbers are assigned only when an invoice is printed. This feature allows you to use preprinted invoice numbers on your forms.
You can use this selection to print an invoice.
You can also use this selection to reprint an invoice that has been printed but not posted. If the invoice has been posted, in order to reprint it, use the menu selection Reprint. See the Reprinting Invoices section below.
Unless you use batch controls, only one user at a time can print invoices. This prevents duplicate invoice numbers from being assigned. If Invoices currently being printed try again later appears, another user is already printing invoices.
Select
Print invoices from the Invoices menu.
Graphical Mode
The following screen appears:
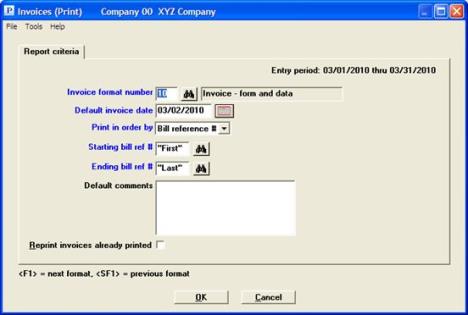
Character Mode
The following screen appears:
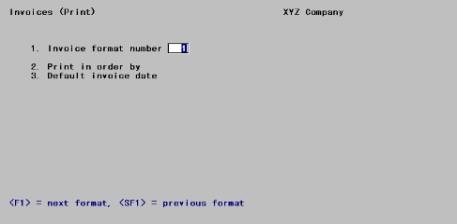
If you are using date controls, the date range (from Control information) will display in the upper right. This date range applies to the Default invoice date field.
Enter the information as follows:
Options
Enter the number of the invoice format to use for these invoices. This must be a valid entry in Invoice formats and must have been verified. You may use one of the options:
|
<F1> |
For the next invoice format |
|
<SF1> |
For the previous invoice format |
|
Format |
99. The default is whatever has been specified in Control Information |
|
Example |
Type 2 |
Enter a date to be assigned as the invoice date to all invoices that do not already have an invoice date.
|
Format |
MMDDYY The default is the system date. |
|
Example |
Press <Enter> |
You may be warned or stopped against entering a date that is outside the allowed date range. Read about Date Control in the Control information chapter.
Select to print invoices in order by Bill reference #, Customer number, Customer name or Bill group.
|
Format |
Drop down list. The default is Bill reference # |
|
Example |
Press <Enter> for Bill reference number |
As soon as a valid sequence is chosen, the bottom half of the screen displays.
Ending
Options
Enter the range of numbers or names to print, where choice represents whatever you entered in the Print in order by field. At each field you may use one of the options:
|
<F1> |
(customer name only) To toggle between entering a personal name and a corporate name. |
|
<F2> |
For the First starting choice or Last ending choice |
|
Format |
6 characters for bill reference number 12 characters for customer number 25 characters for company name 14 characters for person’s surname 10 characters for person’s personal name 3 characters for group code |
|
Example |
Press <F2> at each field. |
Comments already entered on specific invoices will be printed as is.
You can enter default comments which will be printed on any invoice that does not have its own individual comments. Press <F2> to end the comment.
|
Format |
5 lines, each up to the maximum Comment text length specified in A/R Control Information |
|
Example |
Press <F2> to leave comment field blank |
Reprint invoices already printed
Check this box to reprint invoices already printed, or leave it unchecked to skip any invoices within the selected range which have already been printed. A reprinted invoice will not necessarily be assigned the same invoice number as the original; when the invoice is posted, only the most recent invoice number will be retained on file.
|
Format |
Check box, checked is yes and unchecked is no. The default is unchecked |
|
Example |
Press <Enter> for the default of unchecked |
Make any changes.
Select Ok to print the invoices or select Cancel to return to the menu.
If you answered Y to Use pre-printed forms ? in Invoice formats General appearance, see Invoice Formats), the following message is displayed:
Please mount invoice forms on printer and check this box when ready
If you answered N to Use pre-printed forms ?, you are not asked to mount forms.
Laser Printing
If you are using laser printer forms, load the forms in the printer’s paper tray according to the instructions in your printer’s user documentation or help.
Dot Matrix Printing
Mount the preprinted invoice forms on the printer so that the print head is at the top of the form. Adjust the printing pressure according to the thickness of the invoice forms. When you have finished mounting the forms, type DONE.
PDF Forms and Graphical Image Forms
Portable Document Format (PDF) is a file format used to represent documents in a manner independent of application software, hardware, and operating system. Passport has adopted the PDF file type for printing forms such as A/R invoices.
The process in PBS merges an image file of the invoice form with the invoice data you entered so that each invoice produces one PDF file. Loading pre-printed paper forms is not required for PDF printing. For more information on merging a graphical invoice image with the data, see the 3. Graphic image file name ? field in the Invoice Formats chapter.
Select a -PDF- or -PDFP- printer, from Company information, to generate PDF (Acrobat type) invoice files. They will both create PDF files, however the -PDFP- printer will also print the invoices.
When using a -PDF- or -PDFP- printer, as setup in Company information, the invoices are saved to PDF files. For information on the setup of a Company information PDF printer see the Company information chapter in the PBS Administration documentation.
An invoice can be sent to your customer by manually attaching the file to an email. In UNIX or Linux this is your only option. The PDF invoice files are written in the PDFFIL\ARINVOICES folder. To help identify the file you are looking for, you need to know the makeup of the file name. An example of an invoice file name is xx_ARI_1_001101.PDF. The xx is the company number. The ARI indicates it is an Accounts Receivable Invoice. The ’1’ is the customer number and the 001101 is the invoice number.
Invoice PDF Viewing and Emailing
See the Email configuration appendix from the PBS Administration documentation for the steps needed to set up this feature.
Once invoice PDFs have been generated, you may view and email them from PBS. Select Email/view printed PDFs from the PDF form file processing selection under CTL. Under that selection A/R invoices displays as an ARInv type. See the PDF Form File Processing chapter in PBS System documentation for details on the process of displaying and emailing PDF files from PBS.
Invoice Alignment and Adjustment
You are asked: Print alignment ?. Select Yes to print a test alignment form filled out with lines of X’s and 9’s.
If printing on a laser printer, you are first asked to enter the Up/down adjustment and Left/right adjustment amounts. The values last entered for these amounts are shown. After entering new values or accepting the values shown, you are asked if you want to print an alignment form.
If printing on a laser printer, you will be given the chance to adjust the alignment before printing another alignment form.
Continue to print alignment forms and make necessary adjustments until the invoice forms are properly aligned.
When the alignment is correct, select No to Print alignment ?. You are asked for the starting invoice number.
If you are using a laser printer, before you are asked for the starting invoice number, you will be asked to enter the number of invoice copies and the labels for each copy.
You may also print an invoice alignment as a PDF. The alignment file is named xx_ARI_ALIGNMENT_999999.PDF and is located in PDFFIL\ALIGNMENTS directory.
When printing invoices with a laser printer, use the up/down and left/right alignment to position the printed invoice information to align with your preprinted form. The pre-printed invoice forms are produced according to very exact specifications, but the print position of laser printers may vary slightly from model to model and between manufacturers. These adjustment amounts allow you to compensate for the differences between laser printers so that your invoice information can be positioned correctly on the invoice form. (The very early models of Hewlett-Packard laser printers, such as the LaserJet+ and more recent Windows-only printers do not support this adjustment feature.)
When using a laser printer, you can save invoice forms by printing the alignment on plain paper. After printing the alignment on plain paper, place the plain paper on top of one of your preprinted invoice forms. Hold them up to a bright light to verify the alignment. Make any adjustments necessary and continue printing alignments on plain paper until you have the correct alignment. Load your preprinted invoice forms in the paper tray before selecting no to Print alignment ?.
Loading forms is not required for PDF printing and format types that merge with a graphical image.
Enter number of copies to print
A screen displays that asks for the number of copies and a label for each copy. A label is not required for any of the copies. Make changes as needed. The program will recall the last settings for copies and labels.
Collate forms
Check this box if you want to collate invoices with multiple pages and when printing multiple copies. When you select to print multiple copies to a Windows or Company information printer and there are more line items than will fit on one page, the program will collate the printed pages. Collate means: for each copy page two follows page one, page three follows page two and so on. When you do not check this field the program does not collate; it prints all the page one copies first, then it prints all page twos and so on.
Enter the starting invoice number for the first invoice to print. An invoice is assigned an invoice number when it is printed. Until that time, it is identified only by the bill reference number.
This field cannot be defaulted using MySet.
If you enter a number lower than the next available number in Control information, you will receive a warning message.
|
Format |
999999 The default is the next available number in Control information. |
|
Example |
Press <Enter> |
The invoices are then printed.
If there are no invoices in the range selected, then a "No invoices to print" message displays. Select OK to return to the main screen.
Are invoices just printed ok?
Select No if they are not.
If you select Yes, the invoices are marked as OK to post, and the screen to enter the print range reappears.
When through printing invoices, press <Esc>. If you answered Y to 11. Use pre-printed forms ? in Invoice formats, you are instructed:
Please mount regular paper on printer and check this box when ready
Change the paper, check the box when done.
If you answered N to Use pre-printed forms ?, the above message does not appear.
This selection posts invoices.
If you are using the PBS I/C, inventory is also fully updated.
If you are also using the PBS Job Cost module, the billing information is posted to the Job Cost module.
You must have already printed an invoice, and have answered Y to the question Invoices printed okay ?, before you can post it. A register of posted invoices is printed at the time the invoice is posted.
When I/C and A/R are interfaced and you are using FIFO or LIFO as their cost valuation method, the following Inventory changes will happen when a credit memo is entered in A/R->Invoices.
When the credit memo is for an item that is not returned to inventory, but scrapped:
| • | A credit memo type Inventory Transaction History record will be generated storing the quantity credited and the cost entered. |
| • | A G/L distribution is generated to credit the I/C default credit memo account using the cost entered multiplied by the quantity credited. |
| • | An Adjustment type Inventory Transaction History record will be generated to account for the change to the Layer file. Since at the time the credit memo is posted, the layer record that contains the true cost of the item at the time it left inventory may no longer exist, the program use the cost of the first layer record it finds. |
| • | The quantity of the layer record used in the previous step is adjusted. If the quantity returned is greater than available on that layer, other layer records will be adjusted. |
| • | A G/L distribution is generated to debit the A/R inventory scrap account using the cost of that layer entered multiplied by the quantity credited. |
| • | A new layer record is generated for the quantity credited at the cost entered. |
| • | A G/L distribution is generated to debit the proper Inventory account (e.g., Merchandise) to account for the difference in cost entered multiplied by the quantity credited. |
When the credit memo is for an item that is returned to inventory:
| • | A credit memo type inventory transaction history record will be generated storing the quantity credited and the cost entered. |
| • | A G/L distribution is generated to credit the I/C default credit memo account using the cost entered multiplied by the quantity credited. |
| • | A new layer record is generated for the quantity credited at the cost entered. |
| • | A G/L distribution is generated to debit the proper inventory account (e.g., Merchandise) to account for the cost entered multiplied by the quantity credited. |
The posting of invoices involves up to three different parts. Each of these parts is actually a separate posting in itself:
| • | There is always the posting of A/R Miscellaneous charges transactions. |
| • | If you selected Cash only to the Invoice pmt type field in Control information the handling of cash entered on invoices depends upon the setting of the field Use cash as memo only which is also in Control information. |
If you assigned prepaid amounts to an invoice offsetting prepaid amounts and payment types are posted to open items. If batch controls are in effect, a separate batch is created for these transactions, and a batch number is assigned automatically.
If you selected None the cash entered on invoices is treated as memo information and no automatic transactions are created.
| • | If you are using the PBS Inventory Control module, there is the posting of Inventory entries in I/C. |
For each of these three parts of the posting, a different register or journal is produced: the Sales Journal for Miscellaneous Charges transactions, the Cash Receipts Journal for cash receipts transactions, and the Inventory Transaction Register for inventory transactions.
You might also have a fourth register the Miscellaneous and Drop-Ship Item Register if you are using the PBS I/C and you have miscellaneous or drop-ship items on one or more invoices.
Never interrupt posting while the processing and register printing is occurring. If this occurs, you must immediately complete the interrupted posting before doing anything else with the A/R module.
To complete the posting, select the appropriate posting functions (Cash receipts, Miscellaneous charges, Inventory) and allow each to run to completion, then let the posting run until the end. It does not matter whether you select any additional invoices to post at this time.
The G/L postings for Services are as follows:
|
DR |
Customer’s A/R account |
|
CR |
CR G/L Account in line item |
For credit memos, debits and credits are reversed in the above.
The G/L postings for Goods are as follows:
|
DR |
Customer’s A/R account |
|
CR |
CR G/L Account in line item |
The above postings occur whether or not A/R is interfaced to I/C. For credit memos, debits and credits are reversed in the above.
In addition, if A/R is interfaced to I/C, inventory postings occur as described below.
If A/R is not interfaced to I/C, costs and profit margin are not printed on the sales journal. It is not posted through AR Misc charges and it is not included as cost of sales on the sales journal.
When A/R is interfaced to I/C, G/L postings for inventory items (with respect to I/C) are as follows:
Sales:
|
DR |
Item’s expense account |
|
CR |
CR Item’s inventory account |
Credit memos:
|
DR |
Item’s inventory account |
|
DR |
scrap account (if applicable) |
|
CR |
CR Item’s credit memo account |
If the company is using cost centers, the cost center for the expense and credit memo accounts is assigned as specified in Control information. (The cost center can be taken either from the invoice header or from the inventory item itself.)
G/L postings for miscellaneous items (with respect to I/C) are as follows:
Sales:
|
DR |
Item’s expense account |
|
CR |
CR Item’s inventory account |
Credit memos:
|
DR |
Item’s inventory account |
|
CR |
CR Item’s credit memo account |
If the company is using cost centers, the cost center for the expense and credit memo accounts is assigned as specified in Control information. (The cost center can be taken from either the invoice header or the inventory item itself.)
As shown above, the item’s inventory account (as specified in the Item file in Inventory Control) is used for posting of both sales and credit memos.
When a miscellaneous item is entered using Items in Inventory Control, the inventory account entered for the item in I/C should be of type misc costs applied in the Inventory Accounts file in I/C. By choosing the correct misc costs applied account for each miscellaneous item, you can avoid having to make after-the-fact journal adjustments for miscellaneous item sales and credit memos posted from A/R.
If the miscellaneous item sold is not merchandise (e.g. labor charges, service charges, etc.), the misc costs applied account would usually be a contra-expense account. The exact account to use would depend upon your particular business situation, based upon the advice of your accountant.
If the miscellaneous item sold is merchandise, the set-up of the misc costs applied account would depend upon how these items are being handled with respect to General Ledger. For example, if the purchase of the miscellaneous merchandise is entered through the PBS Accounts Payable, then the misc costs applied account should be the account used in Accounts Payable as the expense distribution for the purchase. Again, the exact account to use would depend upon your particular business situation, based upon the advice of your accountant.
For drop-shipped miscellaneous or regular items, the G/L postings are as follows:
Sales:
| CR |
CR Drop-ship clearing acct in the A/R Control information |
|
DR |
Item’s expense account |
Credit memos:
|
DR |
(Not applicable — line items for credit memos may not be drop-shipped.) |
|
CR |
CR (Not applicable) |
Select
Post from the Invoices menu.
See a sample Sales Journal in the Sample Reports appendix.
The following screen appears:
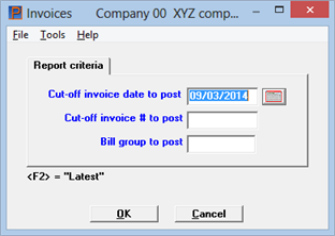
Character Mode
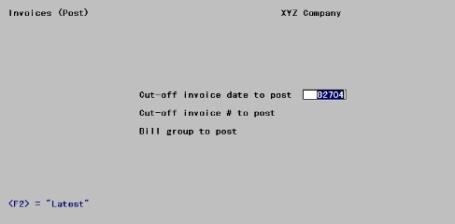
Enter the information as follows:
Options
Enter the invoice date through which you want to post invoices, or use one of the options:
|
<F2> |
For Latest (post all printed invoices) |
|
Enter |
To use the system date |
|
Format |
MMDDYY |
|
Example |
Press <F2> |
Options
Enter the invoice number through which you want to post, or use the option:
|
<F2> |
For "Last" (post all printed invoices) |
|
Format |
999999 |
|
Example |
Press <F2> |
Options
Enter the bill group code of the group of invoices you want to post, or use the option:
|
<F5> |
For invoices in "All" bill groups |
|
Format |
3 characters |
|
Example |
Press <F5> |
You are asked Any change ?.
Answer Y and make changes, or answer N to proceed.
|
Example |
Type N |
Select OK to post the invoices and Cancel to not post the invoices and return to the menu.
Unposted Entries
If there are any Miscellaneous Charges entries (transactions) or inventory entries in I/C, if it is interfaced to be posted, you see a reminder that they will be posted, as well as the invoices you have selected.
If you have allowed cash to be entered with the invoice and have answered the control file to not maintain this as a memo item, cash receipts will also be checked for unposted entries (transactions). If any are found you will also be reminded on the screen displayed.
This review for unposted entries is not performed if you are using batch controls. This is because only those transactions specific to the batch being posted will be processed through Miscellaneous Charges, Cash Receipts, and I/C Inventory.
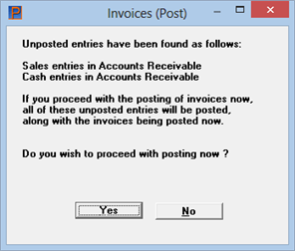
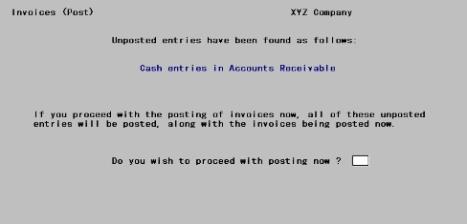
Select Yes or enter Y to proceed with posting; otherwise, select No or enter N.
If you selected Yes, a menu appears for you to select how to print a register of posted invoices and a register of miscellaneous and drop ship goods items. Follow the screen instructions.
All invoices including those created from recurring bills which have been printed and meet the three posting criteria above (Cut-off invoice date, Cut-off invoice #, and Bill group) are posted. If you are using the PBS Inventory Control, they are also posted to I/C.
Refer to the Miscellaneous Charges and Cash Receipts chapters, as well as the Inventory Control applications for examples of registers mentioned here.
Use this selection to reprint an invoice that has already been posted, provided that you have chosen to keep invoice history and that the invoice has not been purged. (Reprinting an invoice that has not already been posted can be done using the Invoices (Print) selection).
If you are interfaced to O/E, be aware that O/E invoices as well as A/R invoices are saved in A/R invoice history. You can use this selection to reprint invoices from either module (provided that you have chosen in that module to keep invoice history).
Only one invoice at a time can be printed. Invoices must be reprinted using invoice printer control stations. If you want to print or view multiple invoices from history by sending them a report or view screen see the Invoice History chapter.
The invoice number of the reprinted invoice is the same as the original. This may be a consideration if you use pre-numbered forms.
Select a -PDF- or -PDFP- printer to generate a PDF (Acrobat type) invoice file.
Reprinting an invoice to a PDF (Acrobat™ type) file may not be necessary, unless the original invoice PDF file was deleted or was originally not generated as a PDF file. If you do reprint the invoice as PDF while the original is there, the original PDF file will be overwritten. However it should be like the original as long as you select the same invoice format.
You may view and email A/R invoices from PBS. Select Email/view printed PDFs from the PDF form file processing selection under CTL. See the Email configuration Appendix from the PBS Administration documentation for the steps on setting up emailing in PBS.
When you generate an A/R invoice as a PDF file, it is stored in the PDFFIL\ARINVOICES directory. You may also locate it there, manually attach the PDF invoice and email it.
Do not reprint invoices that originated in O/E using this program. Use the reprint feature in O/E for that. If you do it will
Select
Reprint from the Invoices menu.
The following screen appears:
Graphical Mode
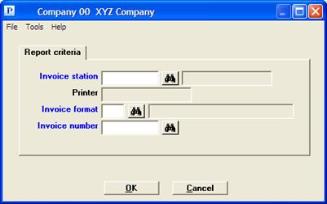
Character Mode
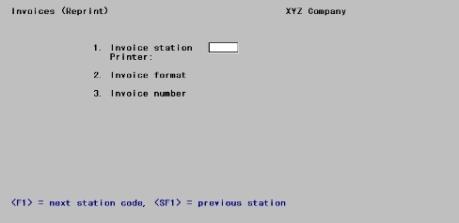
From this screen you can work with existing entries only.
Enter the information as follows:
Options
Enter the number of the invoice station to use for this invoice. This must be a valid entry in Printer control stations (Invoices). You may use one of the options:
|
<F1> |
For the next invoice station |
|
<SF1> |
For the previous invoice format |
Upon entry or selection of a valid invoice station, the name of the associated printer displays.
|
Format |
3 characters. There is no default. |
|
Example |
Type 1 |
If you are merging the data with a graphical image file, then Windows printer must be set up in the invoice station. The printers defined in company information will not merge the image file with the invoice data.
Options
Enter the number of the invoice format to use for this invoice. This must be a valid entry in Invoice formats and must have been verified You may use one of the options:
|
<F1> |
For the next invoice format |
|
<SF1> |
For the previous invoice format |
|
Format |
99 There is no default. |
|
Example |
Type 1 |
Enter the number of the invoice to be reprinted.
|
Format |
999999 |
|
Example |
Type 100 |
Make any changes, then press <Enter>.
Select a printer, and a window opens as follows:
Graphical Mode
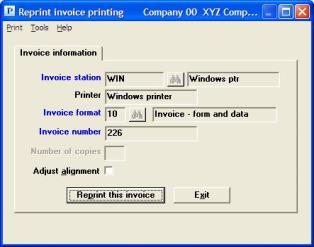
Character Mode
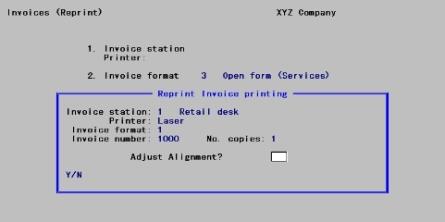
For laser printers, answer Y to adjust the alignment.
For non-laser printers, you will be asked whether you want to print an alignment. Answer Y to do so, or N to print the invoice.
The invoice will be printed at the selected station and the window will clear to allow reprinting another invoice.
Select this button to reprint the invoice.
Select this button to cancel the invoice reprint.