This chapter contains the following topic:
Introduction to Sales Tax Reporting
Three reports are available from the Sales tax reports menu selection. They include Sales tax due, Sales tax report and Sales tax exception report. They are all covered in this chapter.
Some comanies, with minimal sales tax reporting requirements (because subject to only one sales tax, or to none), use the Tax Code List, for all their sales tax needs. If you fall into this category, skip this chapter.
Three reports are accessible from the Sales tax reports menu selection. They include the Sales tax due, Sales tax report and Sales tax exception report.
The Sales tax due and Sales tax exception report are driven by the account numbers entered in tax codes. Refer to the Tax Codes chapter. For these reports to be used effectively, ensure that:
| • | The same G/L account number is assigned to each jurisdiction in whichever tax code it appears. |
| • | No two jurisdictions are assigned the same account number. |
Jurisdiction is used to indicate any state, county, city, or other municipal authority that levies sales taxes.
The Sales tax report is driven by the tax code. The account numbers are not so important with this version of the report.
Before discussing the reports in detail, a summary will be helpful.
Sales tax due edit list and
Sales tax due register
These reports show sales tax information grouped by tax code within General Ledger account. They serve as a basis for paying your sales taxes and document the amount due. They differ from the Tax Code List in the fact that tax codes are consolidated. Grouping sales tax information by General Ledger account breaks out the tax information by jurisdictions to which sales tax must be reported. This minimizes the amount of manual calculations needed to prepare legally-mandated sales reports.
The total tax is obtained by adding together the taxes actually billed for each transaction. This means that the following cases are accurately reflected in the totals:
| • | Two-tiered tax structures. |
| • | Changes in the tax percentage occurring during the course of a period. |
| • | Override tax amount entered by the operator. |
| • | Correct totals for taxes due upon payment rather than upon sale. |
| • | Correct handling of returned checks. |
Detail information is maintained in a separate Sales Tax file/table. When you print the report for the purpose of paying the taxes (as opposed to merely monitoring your tax situation), the transactions printed are also removed from the file or table and the resulting report is a register rather than an edit list.
You can produce the report for any individual tax code or for all tax codes. In either case, the date is summarized by account number rather than tax code; and in either case some of the information printed will likely be meaningful to you and some not:
| • | If you print all tax codes, you will really only be interested in those taxes which fall due as of the date requested. |
| • | If you print one tax code consisting of a state tax and a city tax, only the city tax is meaningful since the state tax totals represent only that portion of the state tax which happens to have been collected within that city. |
If two or more taxes within the same tax code have different reporting periods, or if one is due upon sale and the other upon payment, manual reconciliation is required.
Sales Tax Report
The tax information for this report is grouped by tax code. This is useful when you pay tax to different states. However, it does not differentiate the jurisdictions by G/L account within a tax code.
This report offers the option of a date range. Because of this A/R allows you to retain your tax information for as long as you want. However, if you prefer to purge your past tax data use the Sales tax due edit list.
Optionally you may print each tax code on a different page.
This report lists every occasion on which you charged a sales tax different from the calculated amount; for instance, if you issued a credit memo to a customer for a negative sales tax upon being informed that the customer was tax-exempt. This allows you to justify apparent discrepancies if challenged by the taxing jurisdiction.
The Exception Report is driven by the same information that produces the Sales Tax Due Edit List. It merely lists those detail records which are identified as exceptions. Therefore, once a detail record has been purged via the Sales tax due edit list selection it will also disappear from the Exception Report. Therefore this report is usually run monthly before the Sales Tax Due Register.
Select
Sales tax reports from the Reports, general menu.
Graphical Mode
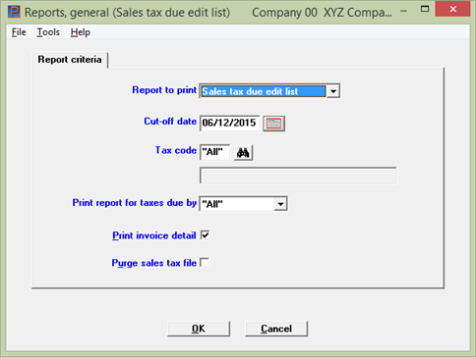
Using graphical mode the program has the focus on the OK button. You may tab to other fields. If you want to default to Sales tax report or Sales tax exception report use MySet and select F11 to default to that report.
Character mode
The first field to enter is Report to print.
From this field you have the following report choices:
|
Character mode |
Graphical mode |
Link to chapter section |
|
E |
Sales tax due edit list |
|
|
S |
Sales tax report |
|
|
X |
Sales tax exception report |
The default is the Sales tax due edit list. If you choose one of the other reports, after you hit the <Enter> or <Tab key, the screen will change to provide fields specific to that report.
|
Format |
Graphical: Drop down list Character: One letter, either E, S or X |
|
Example |
Select Enter for the default of E (Sales tax due edit list) |
A sample Sales Tax Due Edit List is in the Sample Reports appendix.
|
Note |
This report no longer prints report column totals for Total amt and Taxable amt. This is because the amounts were duplicated or more when more than one G/L account has been assigned to a tax code. The Sales tax report will provide an accurate sale amount and taxable amount. |
Starting with the Report to print field, after selecting the default of Sales tax due edit list by hitting <Enter>, the other fields on this screen are available:
Graphical Mode

Character Mode
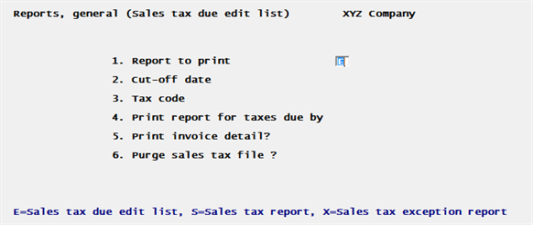
Enter the following information:
Transactions later than this date will not be included in the report. If you are paying your tax from this report, this date should match the cut-off date set by the taxing jurisdiction.
No starting date is entered because the report includes everything since the last time the file/table was purged. Purging is described in the Purge sales tax file field.
|
Format |
MMDDYY The default is the system date; future dates are not permitted. |
|
Example |
Press <Enter> |
Enter the tax code to be included. This must be a valid entry in Tax codes. You may use the option:
Options
|
<F5> |
For All tax codes |
|
Format |
3 characters. There is no default |
|
Example |
Type CTY |
If you have chosen a specific tax code in the previous field, this field may not be changed.
Otherwise, enter:
Options
| Character | Graphical | Description |
|
I |
Invoice date |
For taxes that become due when the invoice is posted. These have the field Due to state based on? in Tax codes set to I. |
|
C |
Collection date |
For taxes that only become due when the customer’s cash receipt is posted. |
You may use the option:
Options
|
<F5> |
For All taxes |
|
Format |
Graphical: Drop down list Character: One letter, either I or C |
|
Example |
(Does not appear in this example because you selected a specific tax code in the Tax code field.) |
|
Note |
Regardless of your entry in the Tax code and Print report for taxes due by fields, the date you have entered in the Cut-off date field is compared to either the invoice date or the collection date of each invoice, as determined by the tax code for that invoice. |
If you answer Y for yes, each invoice will be listed individually. There is no default.
|
Format |
Graphical: Check box where checked is yes and unchecked is no Character: One letter, either Y or N |
|
Example |
Type Y |
Unless you have pressed <F5> to both the Tax code and Print report for taxes due by fields, this field may not be changed.
If you have pressed <F5> to both fields (for All tax codes and reporting methods), you must answer this enter this field in character mode. The default in graphical mode is unchecked.
If you check this box, transactions included in this report will be removed from the file or table and will not appear in future reports. The resulting report is a register rather than an edit list, and must be printed (rather than displayed on the screen). The assumption is that you will be paying the tax from this report.
If you leave this box unchecked, transactions printed remain on file. Do this only if you are using the report to monitor your tax situation, not if you are paying the tax from this report (otherwise you may pay the tax twice).
|
Format |
Graphical: Check box where checked is yes and unchecked is no Character: One character, either Y or N |
|
Example |
Type N |
Select OK to print or Cancel to return to the menu without printing.
Character Mode
Make any needed changes. Press <Enter> when this field is blank to print the Sales Tax Due Edit List (or register, depending on your response to the Purge sales tax file field).
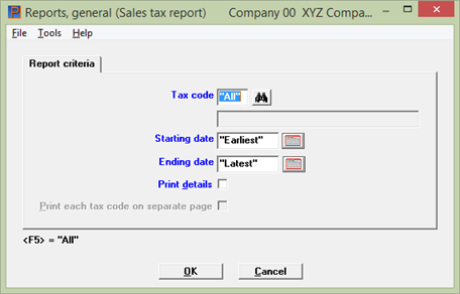
Starting with the Report to print field, after selecting Sales tax report and hitting <Enter> the following screen appears:
Graphical Mode
Character Mode
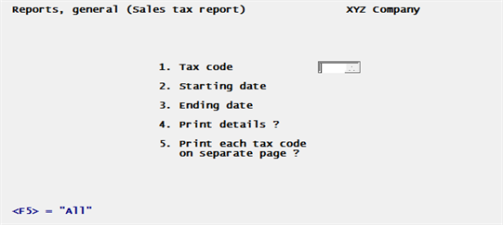
Enter the tax code to be included. This must be a valid entry in Tax codes. You may use the option:
Options
|
<F5> |
For All tax codes |
|
Format |
3 characters. There is no default |
|
Example |
Type CTY |
Entering date
Enter the date range for the tax information you want to include on the report.
You may use the option:
Options
|
<F2> |
For the "Earliest" and "Latest" dates |
|
Format |
MMDDYY for both fields |
|
Example |
Select <F2> for both fields |
Check this box and each invoice will be listed individually.
|
Format |
Graphical: Check box where checked is yes and unchecked is no. The default is unchecked. Character: One letter, either Y or N. There is no default |
|
Example |
Type Y |
Print each tax code on a separate page
This field is not available if you selected only one tax code in the Tax code field and it is also not available unless you selected to Print details in the previous field.
Check this box to print the details for each tax code on a separate page. Leave it unchecked to continue the printing immediately after the previous tax code.
|
Format |
Graphical: Check box where checked is yes and unchecked is no. The default is unchecked. Character: One letter, either Y or N. There is no default |
|
Example |
Type Y |
Select OK to print or Cancel to return to the previous screen.
Character Mode
Make any needed changes. Press <Enter> when this field is blank to print the Sales Tax Report.
A sample Sales Tax Exception Report is in the Sample Reports appendix.
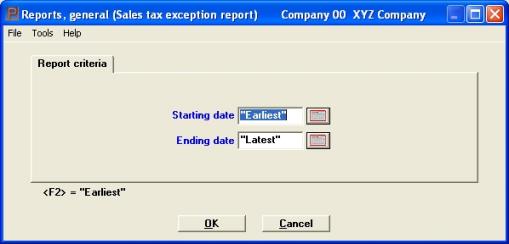
Starting with the Report to print field, after selecting Sales tax exception report and hitting <Enter> the following screen appears:
Graphical Mode
Character Mode
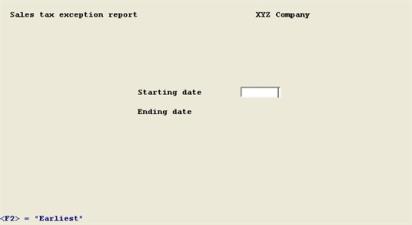
Enter the following information:
Enter the range of dates for which you want to see the sales tax exceptions. Neither date may be in the future. You may use the option:
|
<F2> |
For the Earliest starting date or Latest ending date |
|
Format |
MMDDYY at each field. There is no default. |
|
Example |
Type 030115 for the starting date Type 043015 for the ending date. |
Answer Y to re-enter corrected information, or N to print the report. You will be asked to select a printer; refer to the Starting PBS, Menus and Printing chapter of the System User documentation.